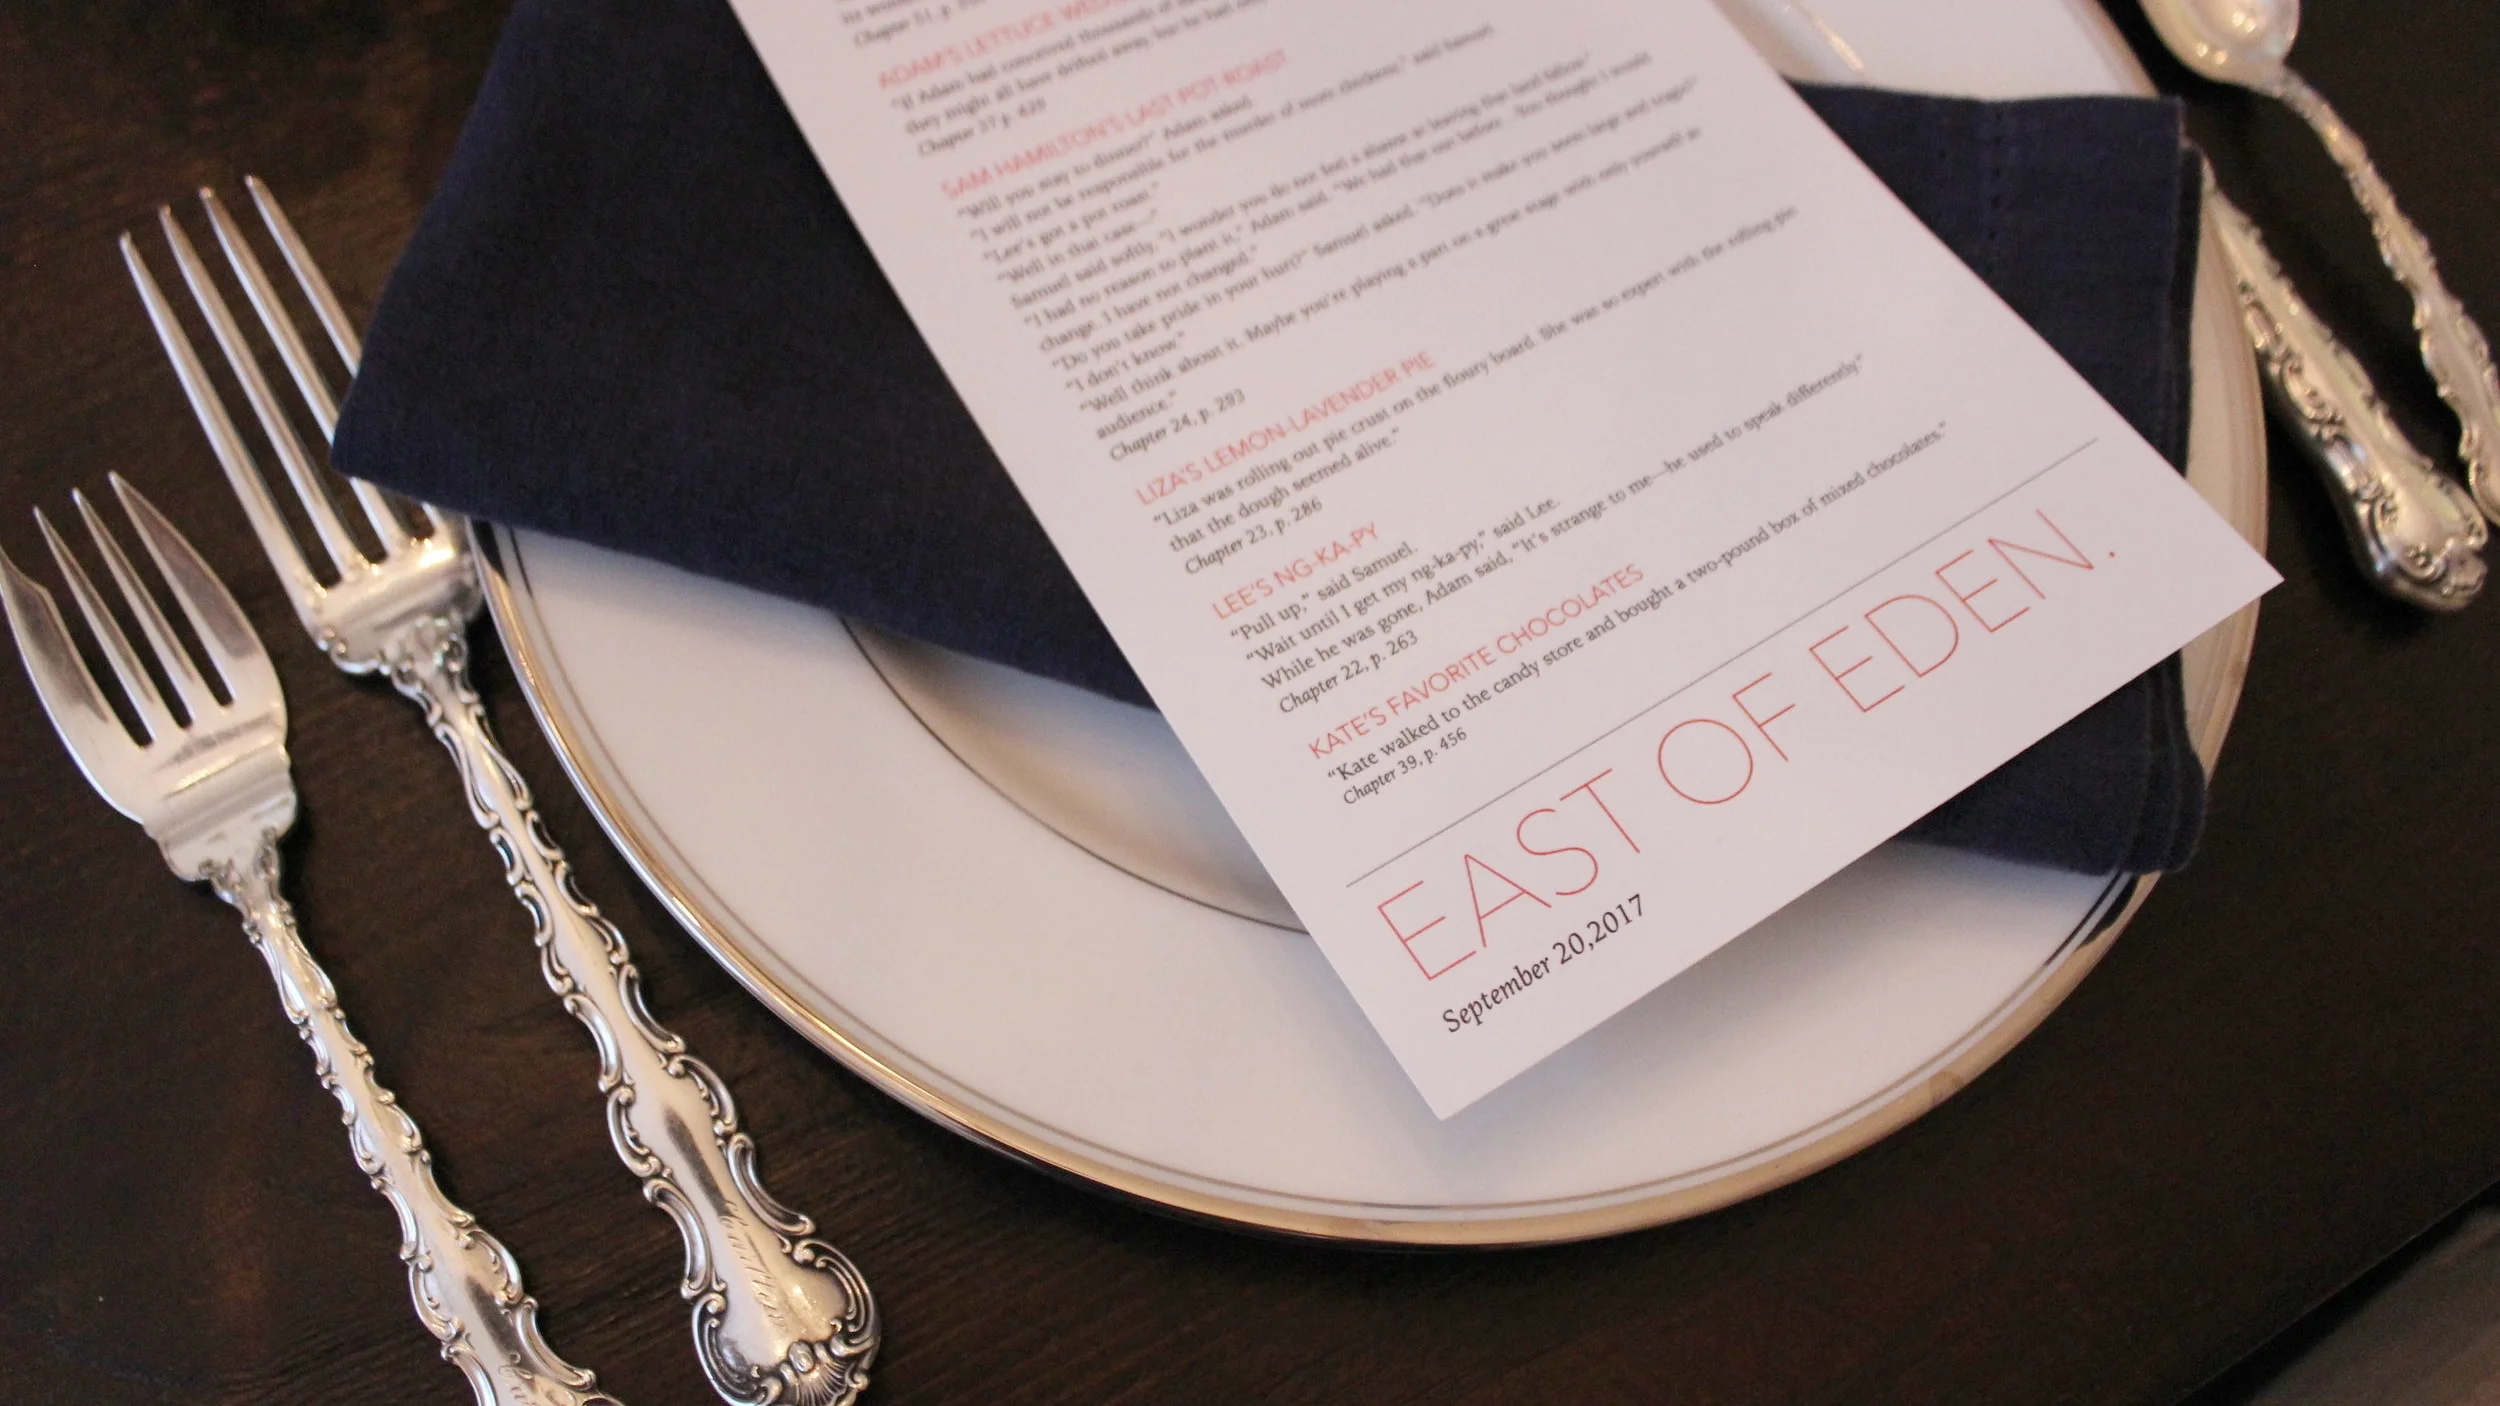
When my book club decided to read East of Eden, I knew I was going to go all out...
Read MoreHOME
The Kitchen Remodel: Before and After
in HOME
Enough teasing. It's time to show off the finished product. Scroll down to the bottom for details, contractors, products etc. For now... let's just look at some pretty before and after shots!
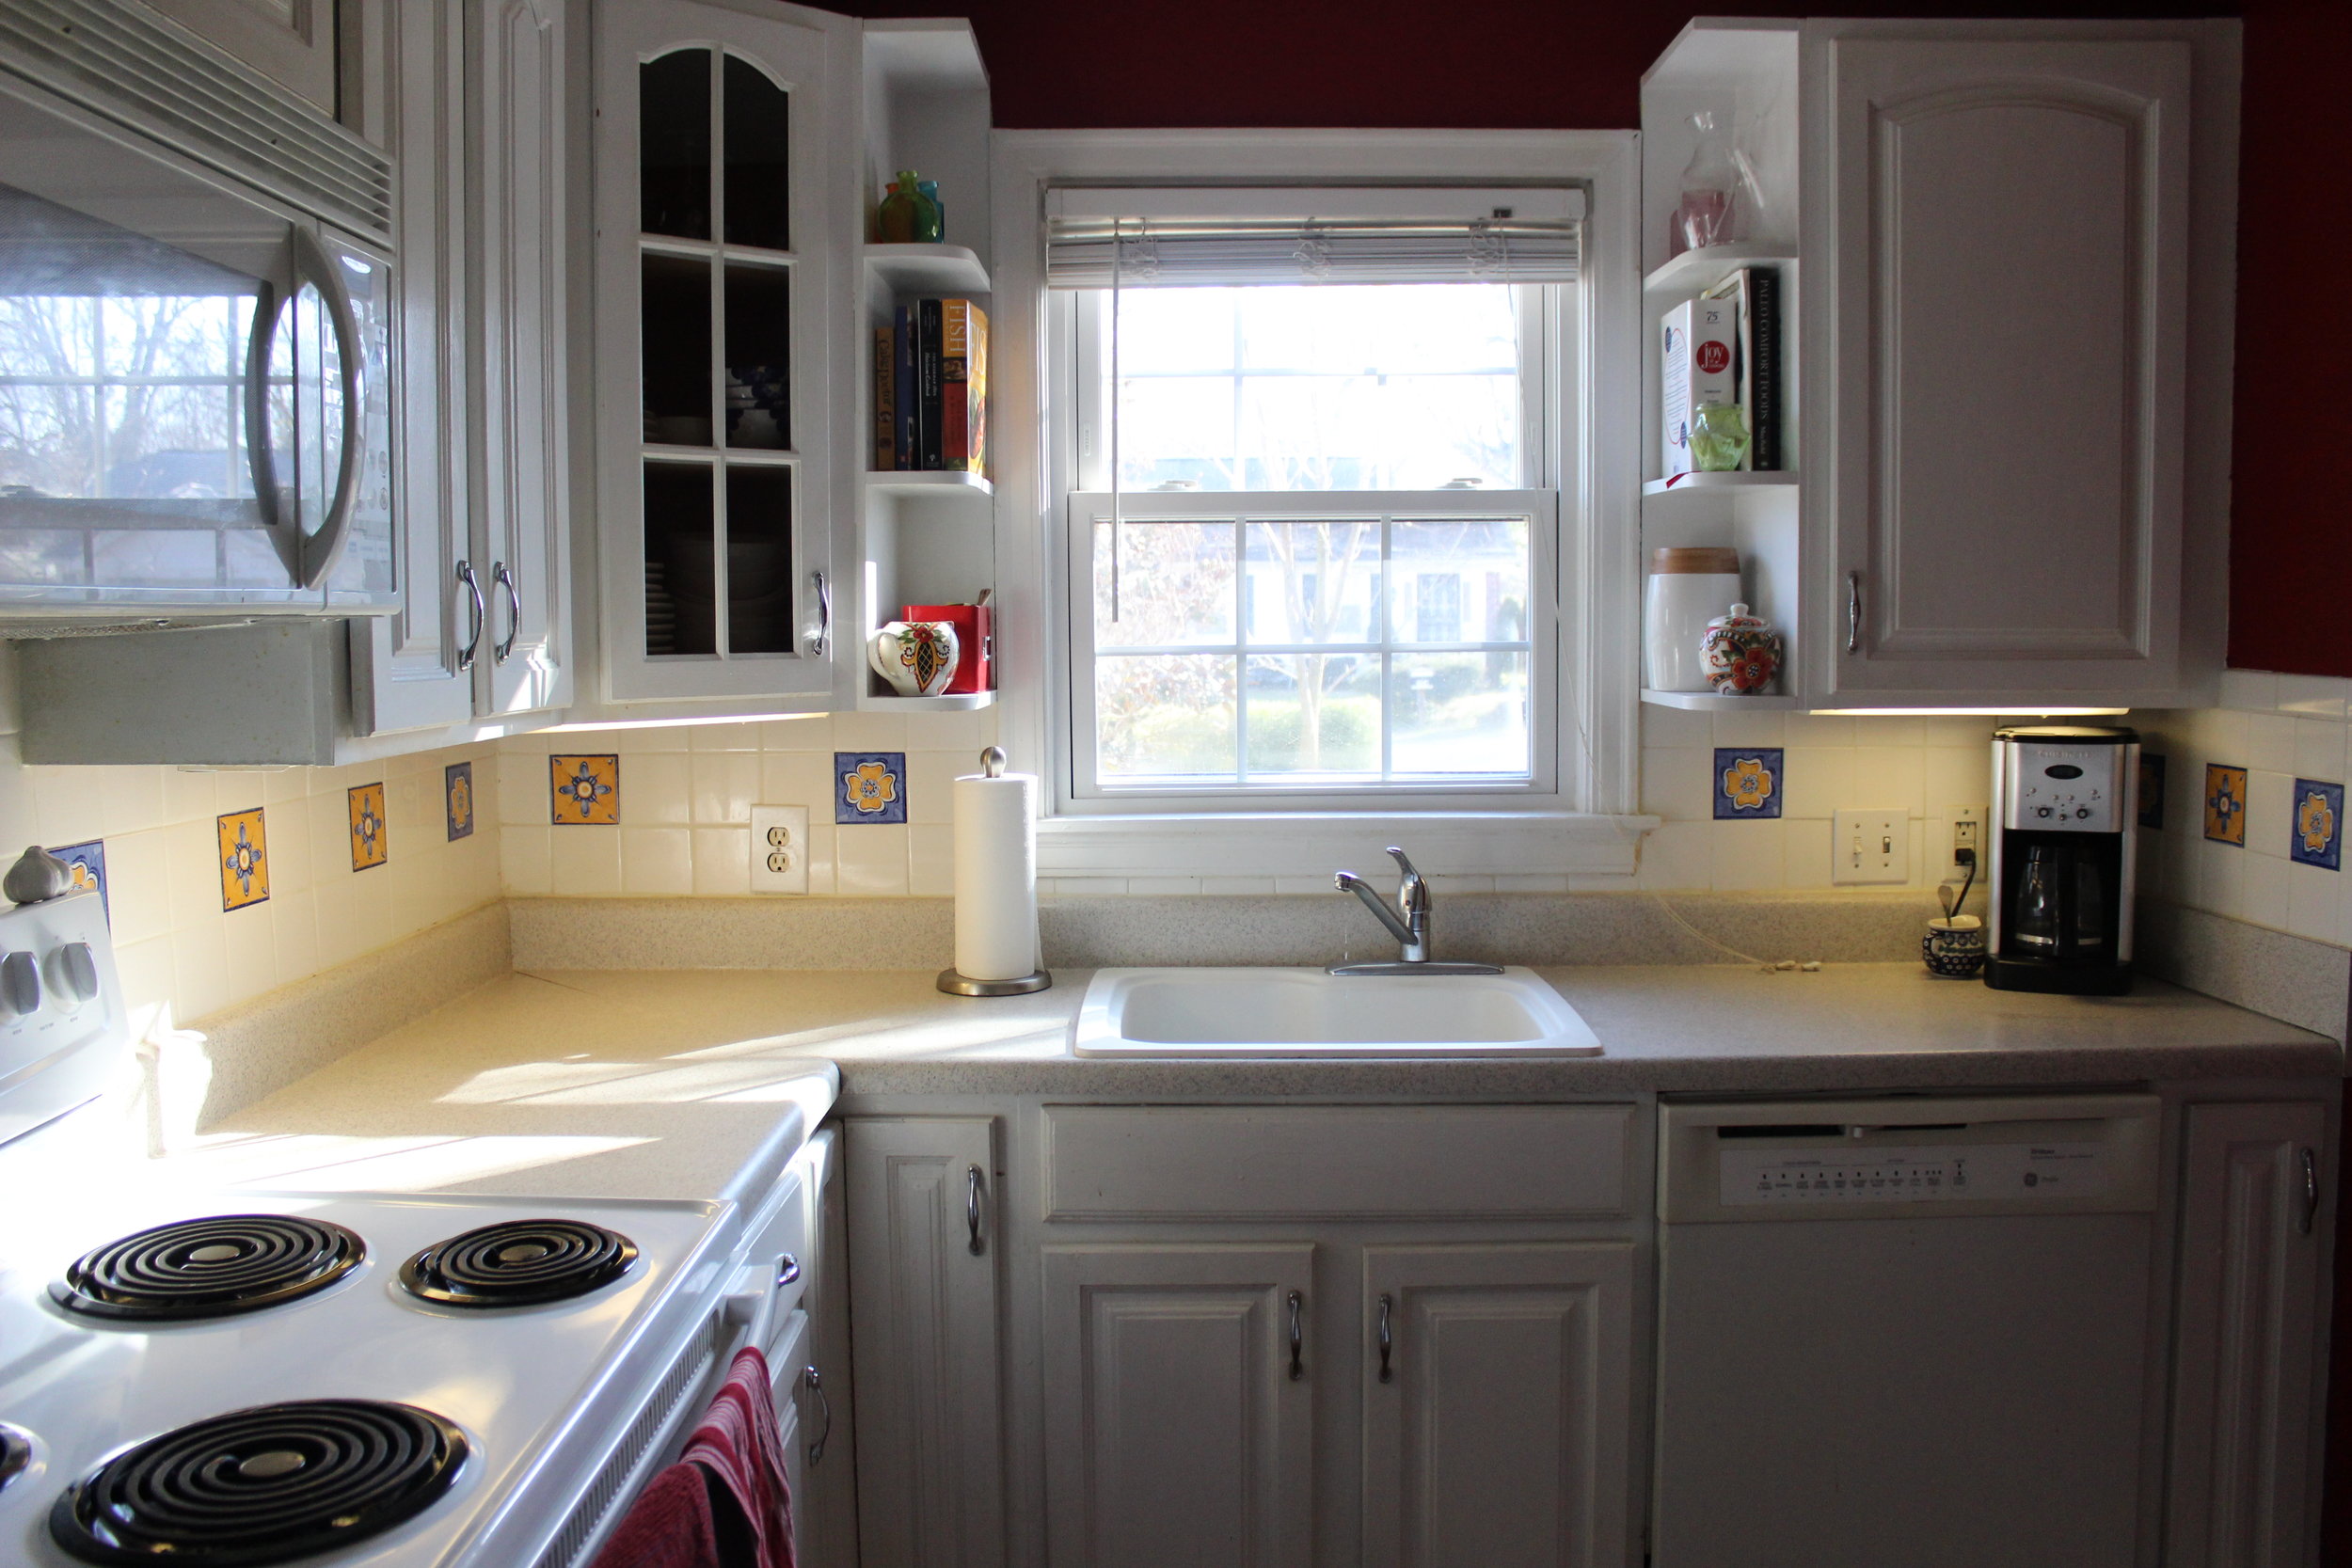
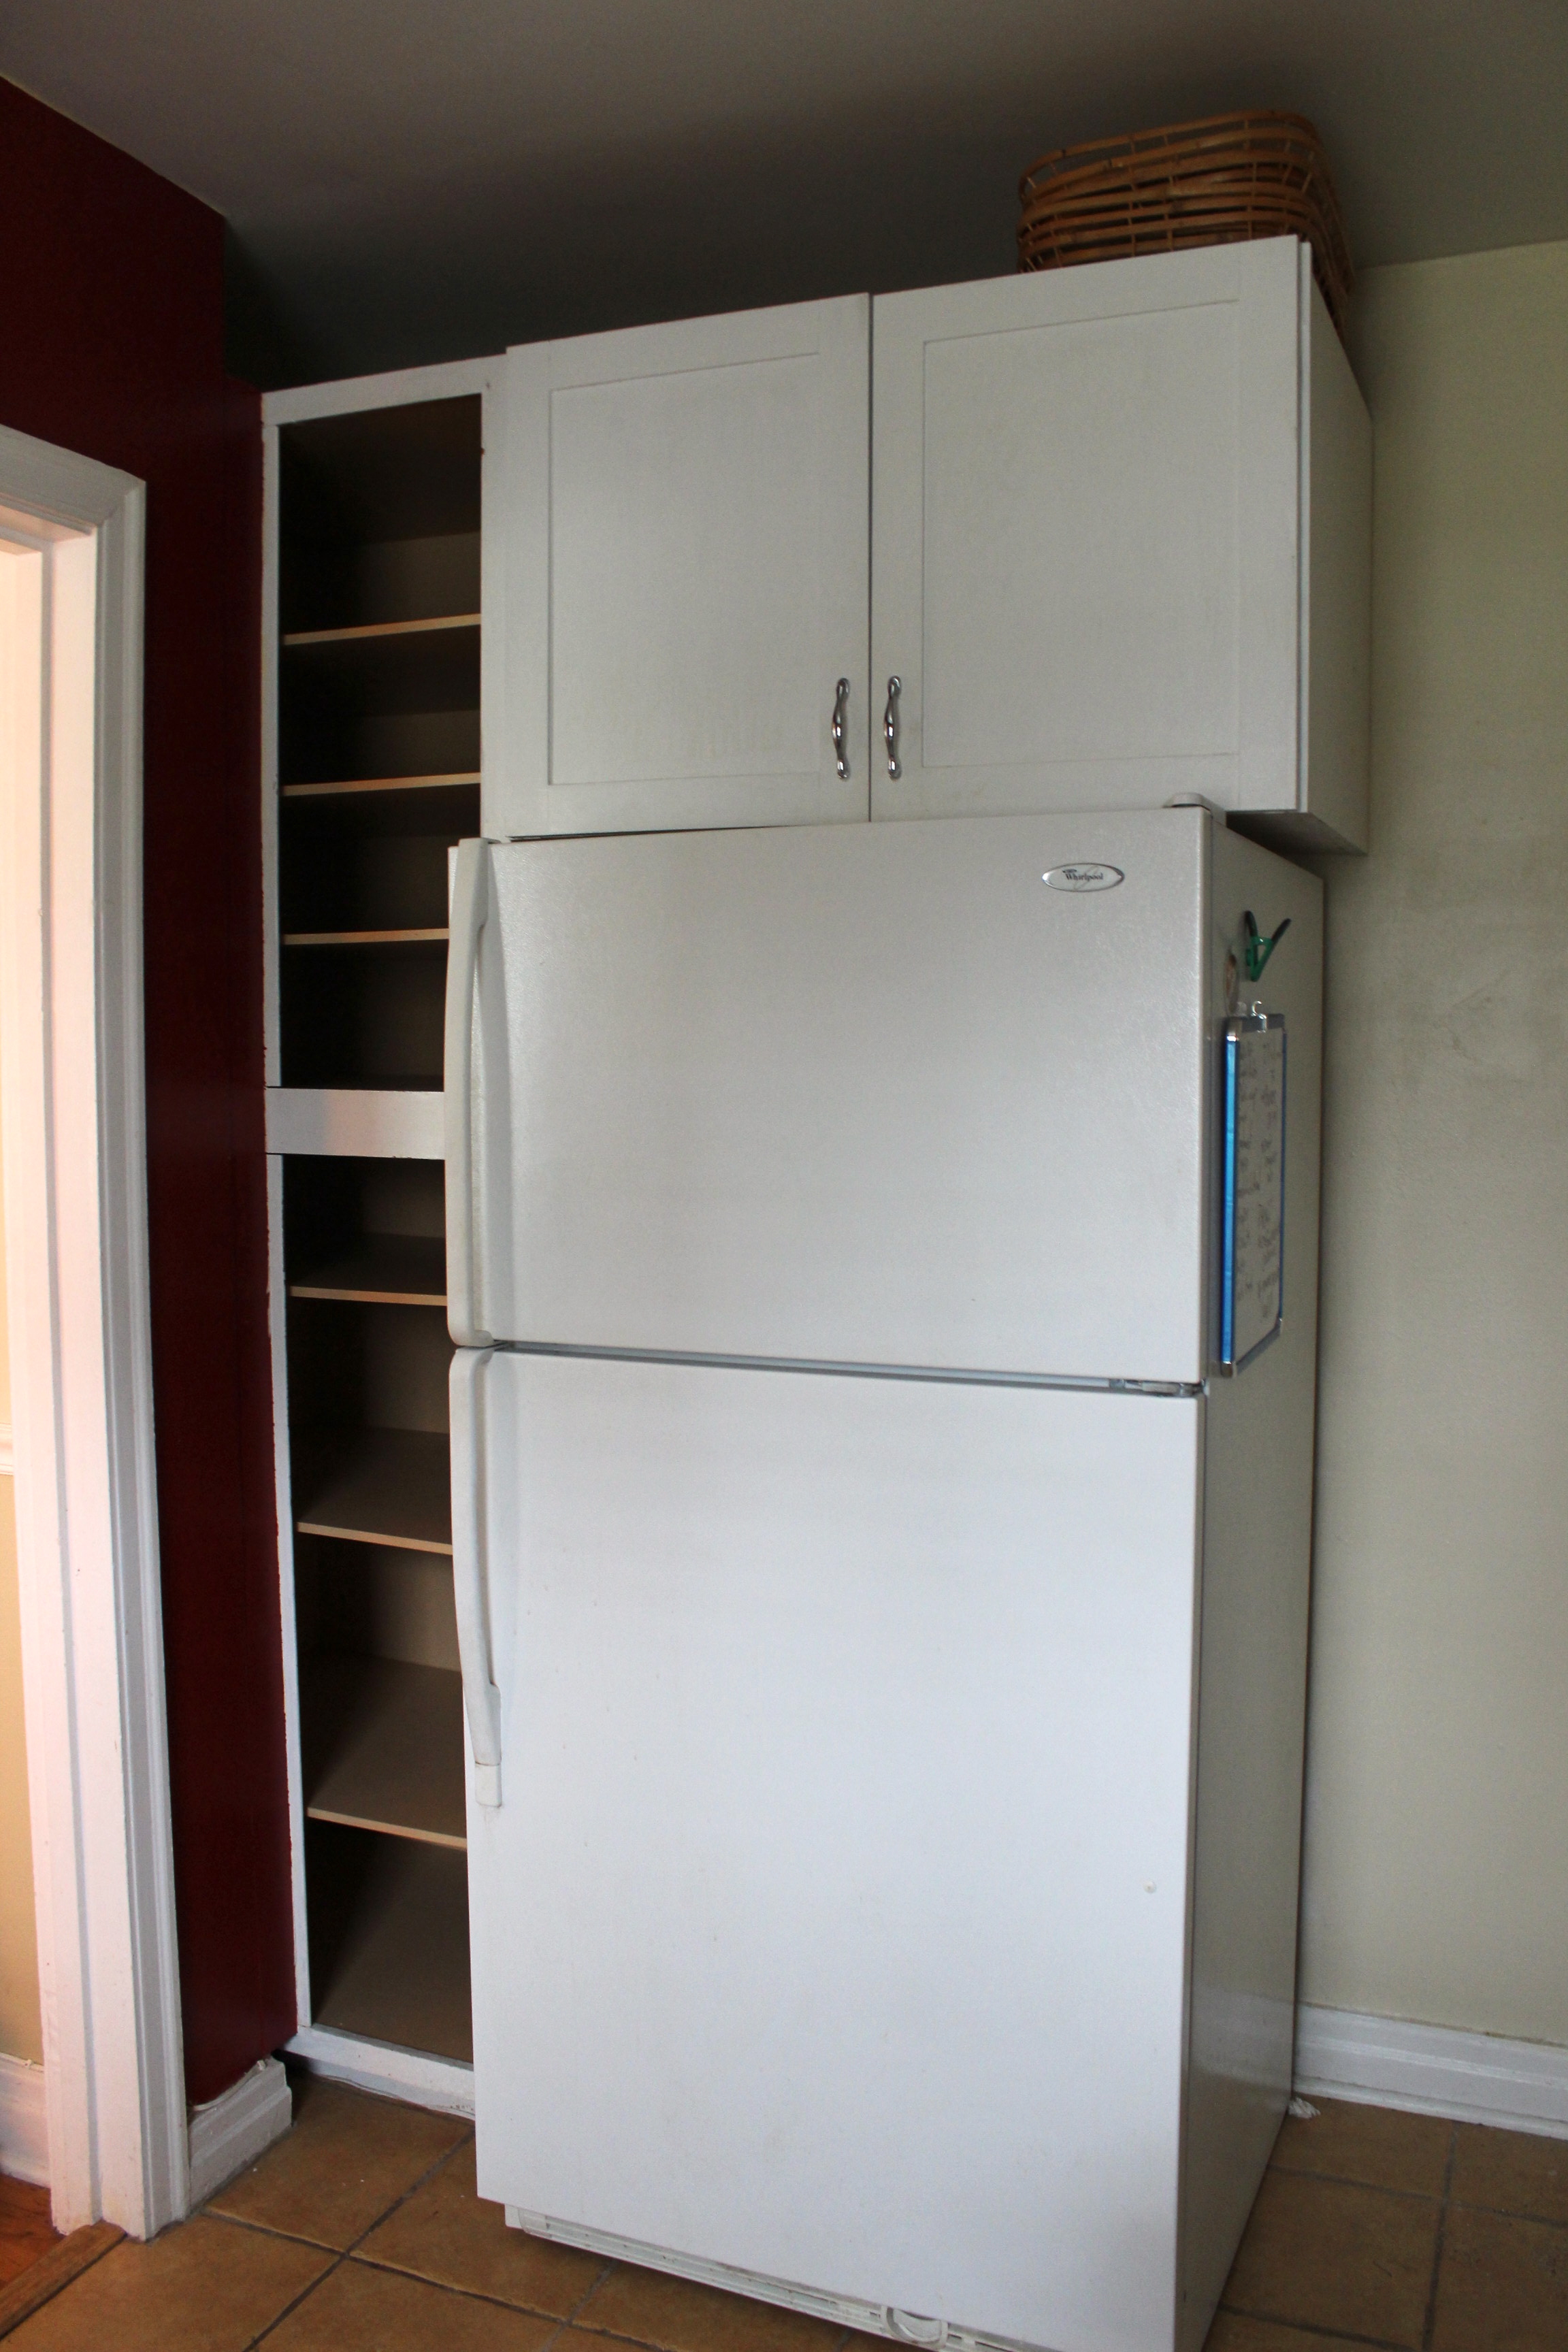
BEFORE
 AFTER
AFTER

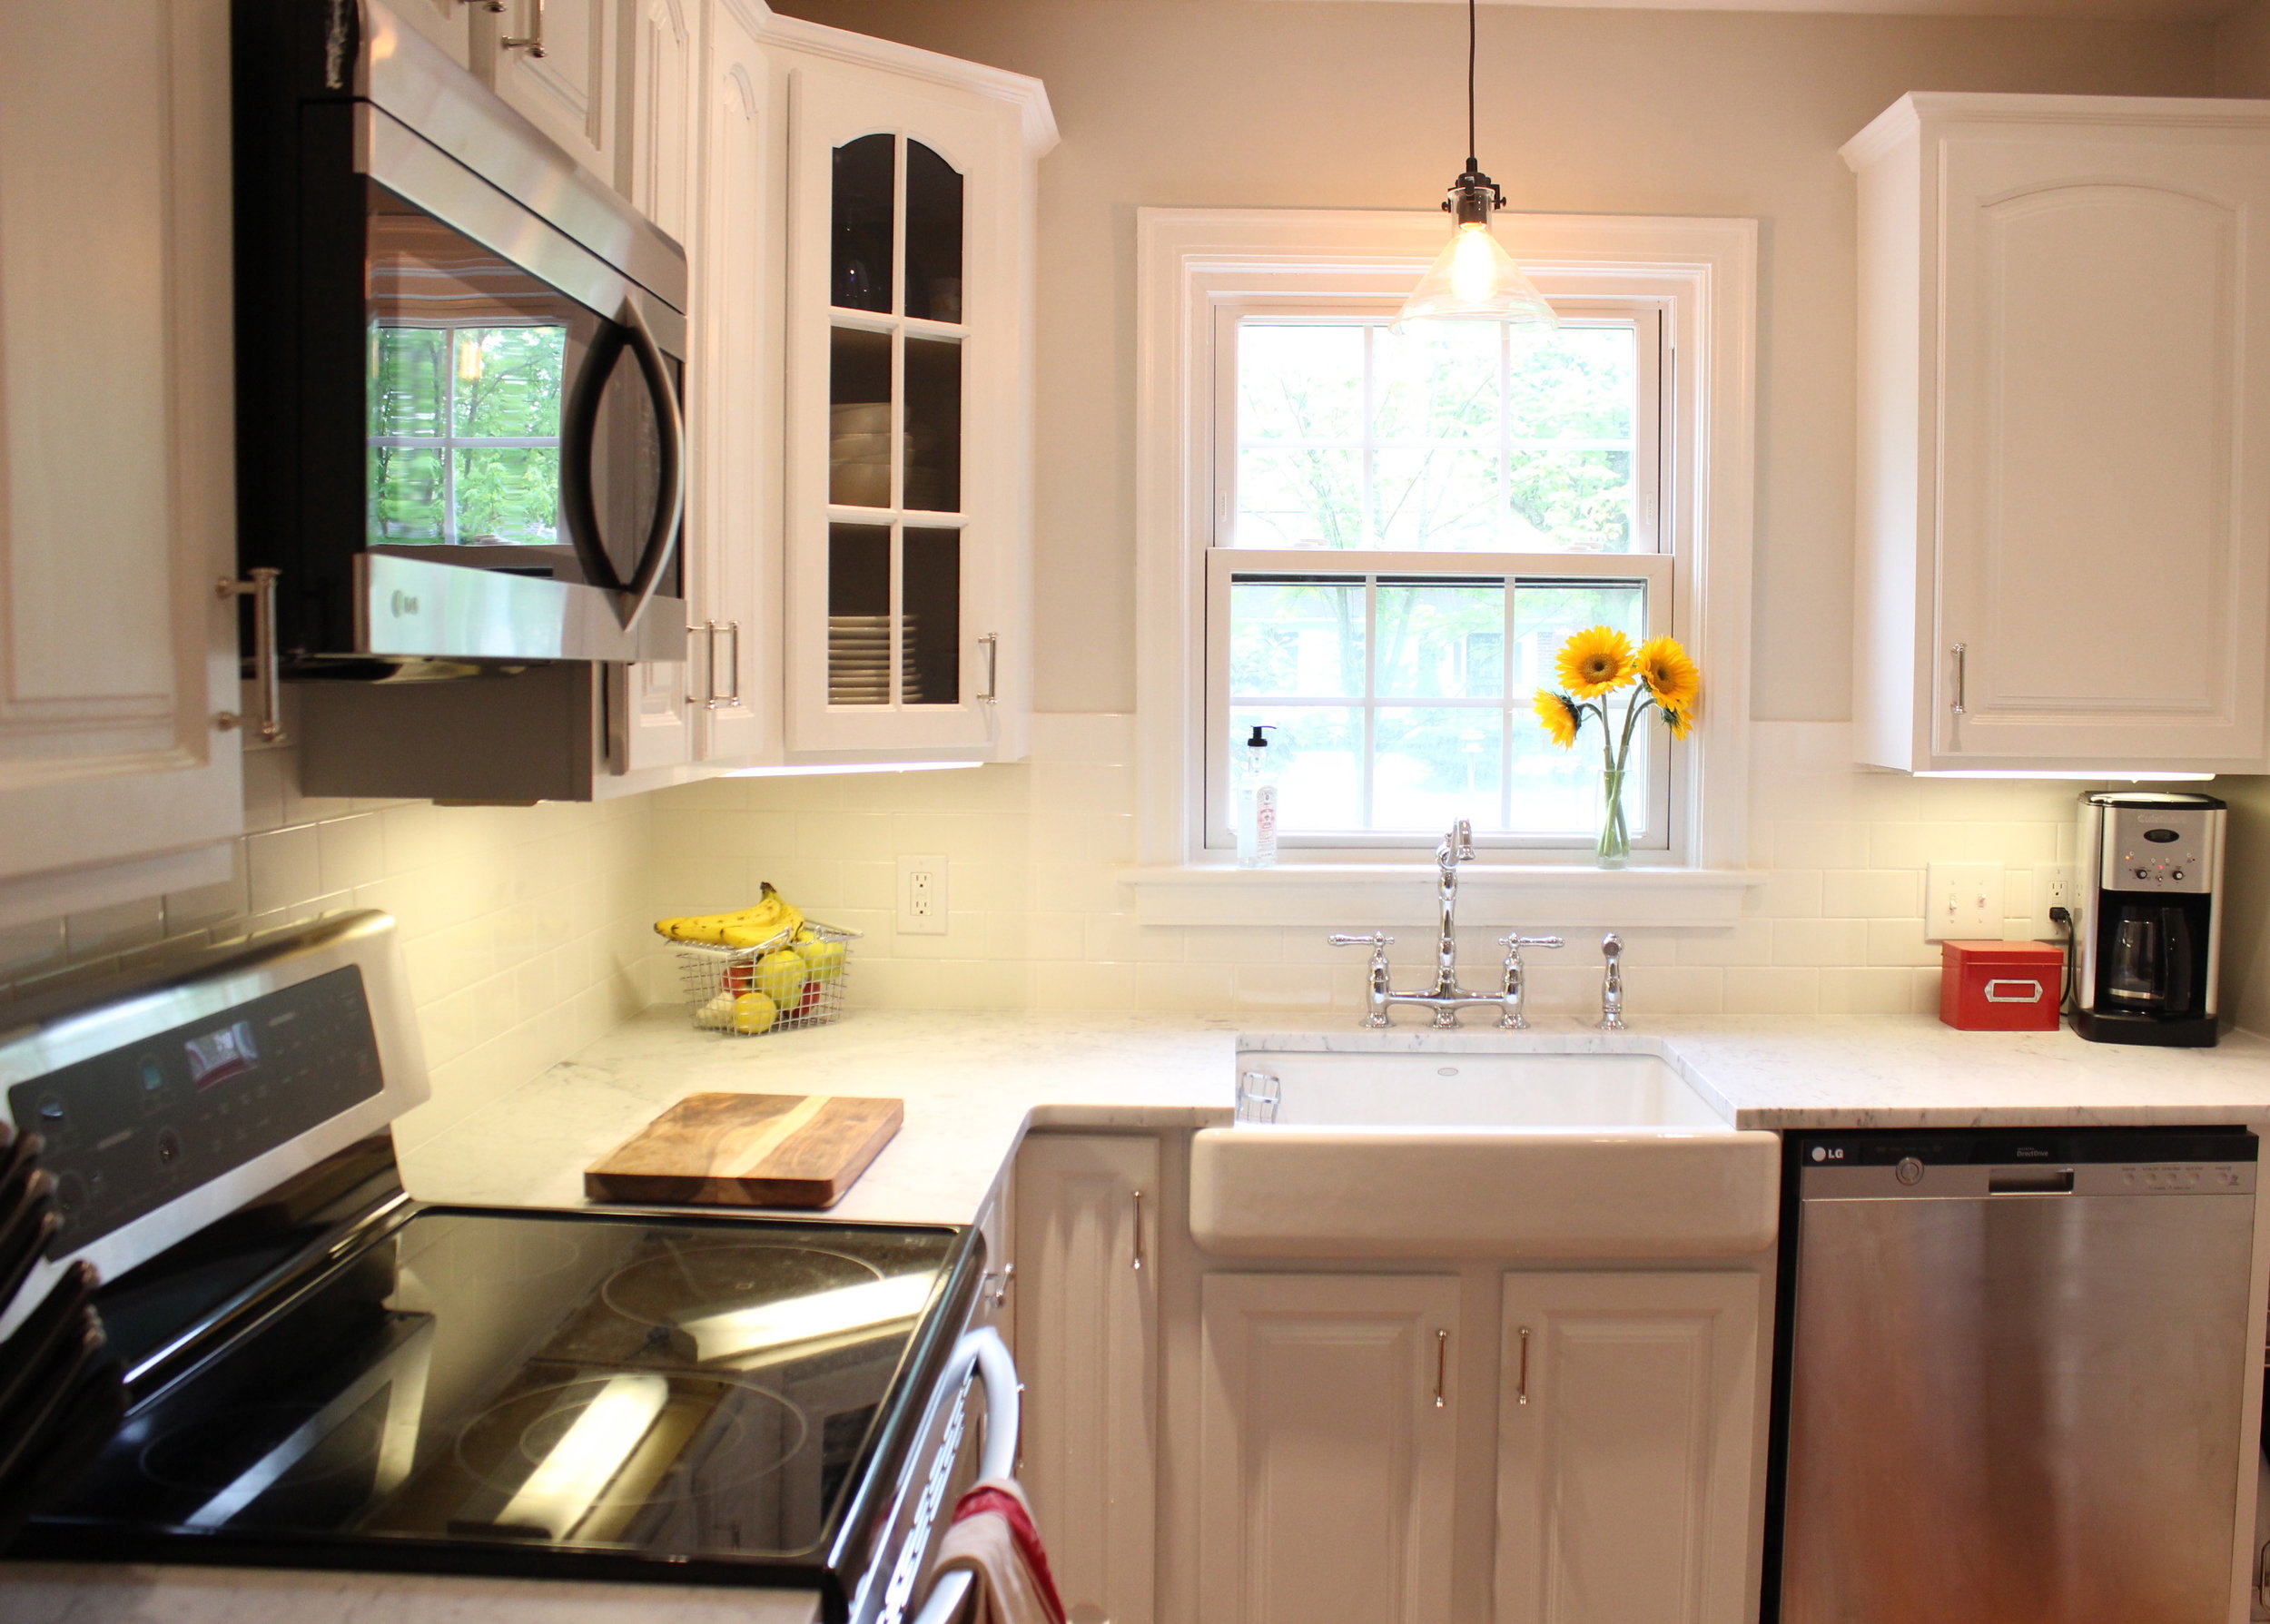
A few things to notice. While we kept the same layout, we changed a few things that made a big difference. We took out those open shelves by the window. We added crown moulding to the top of the cabinet boxes. We added can lights and a new light fixture. We. Painted. Everything.
BEFORE
 AFTER
AFTER
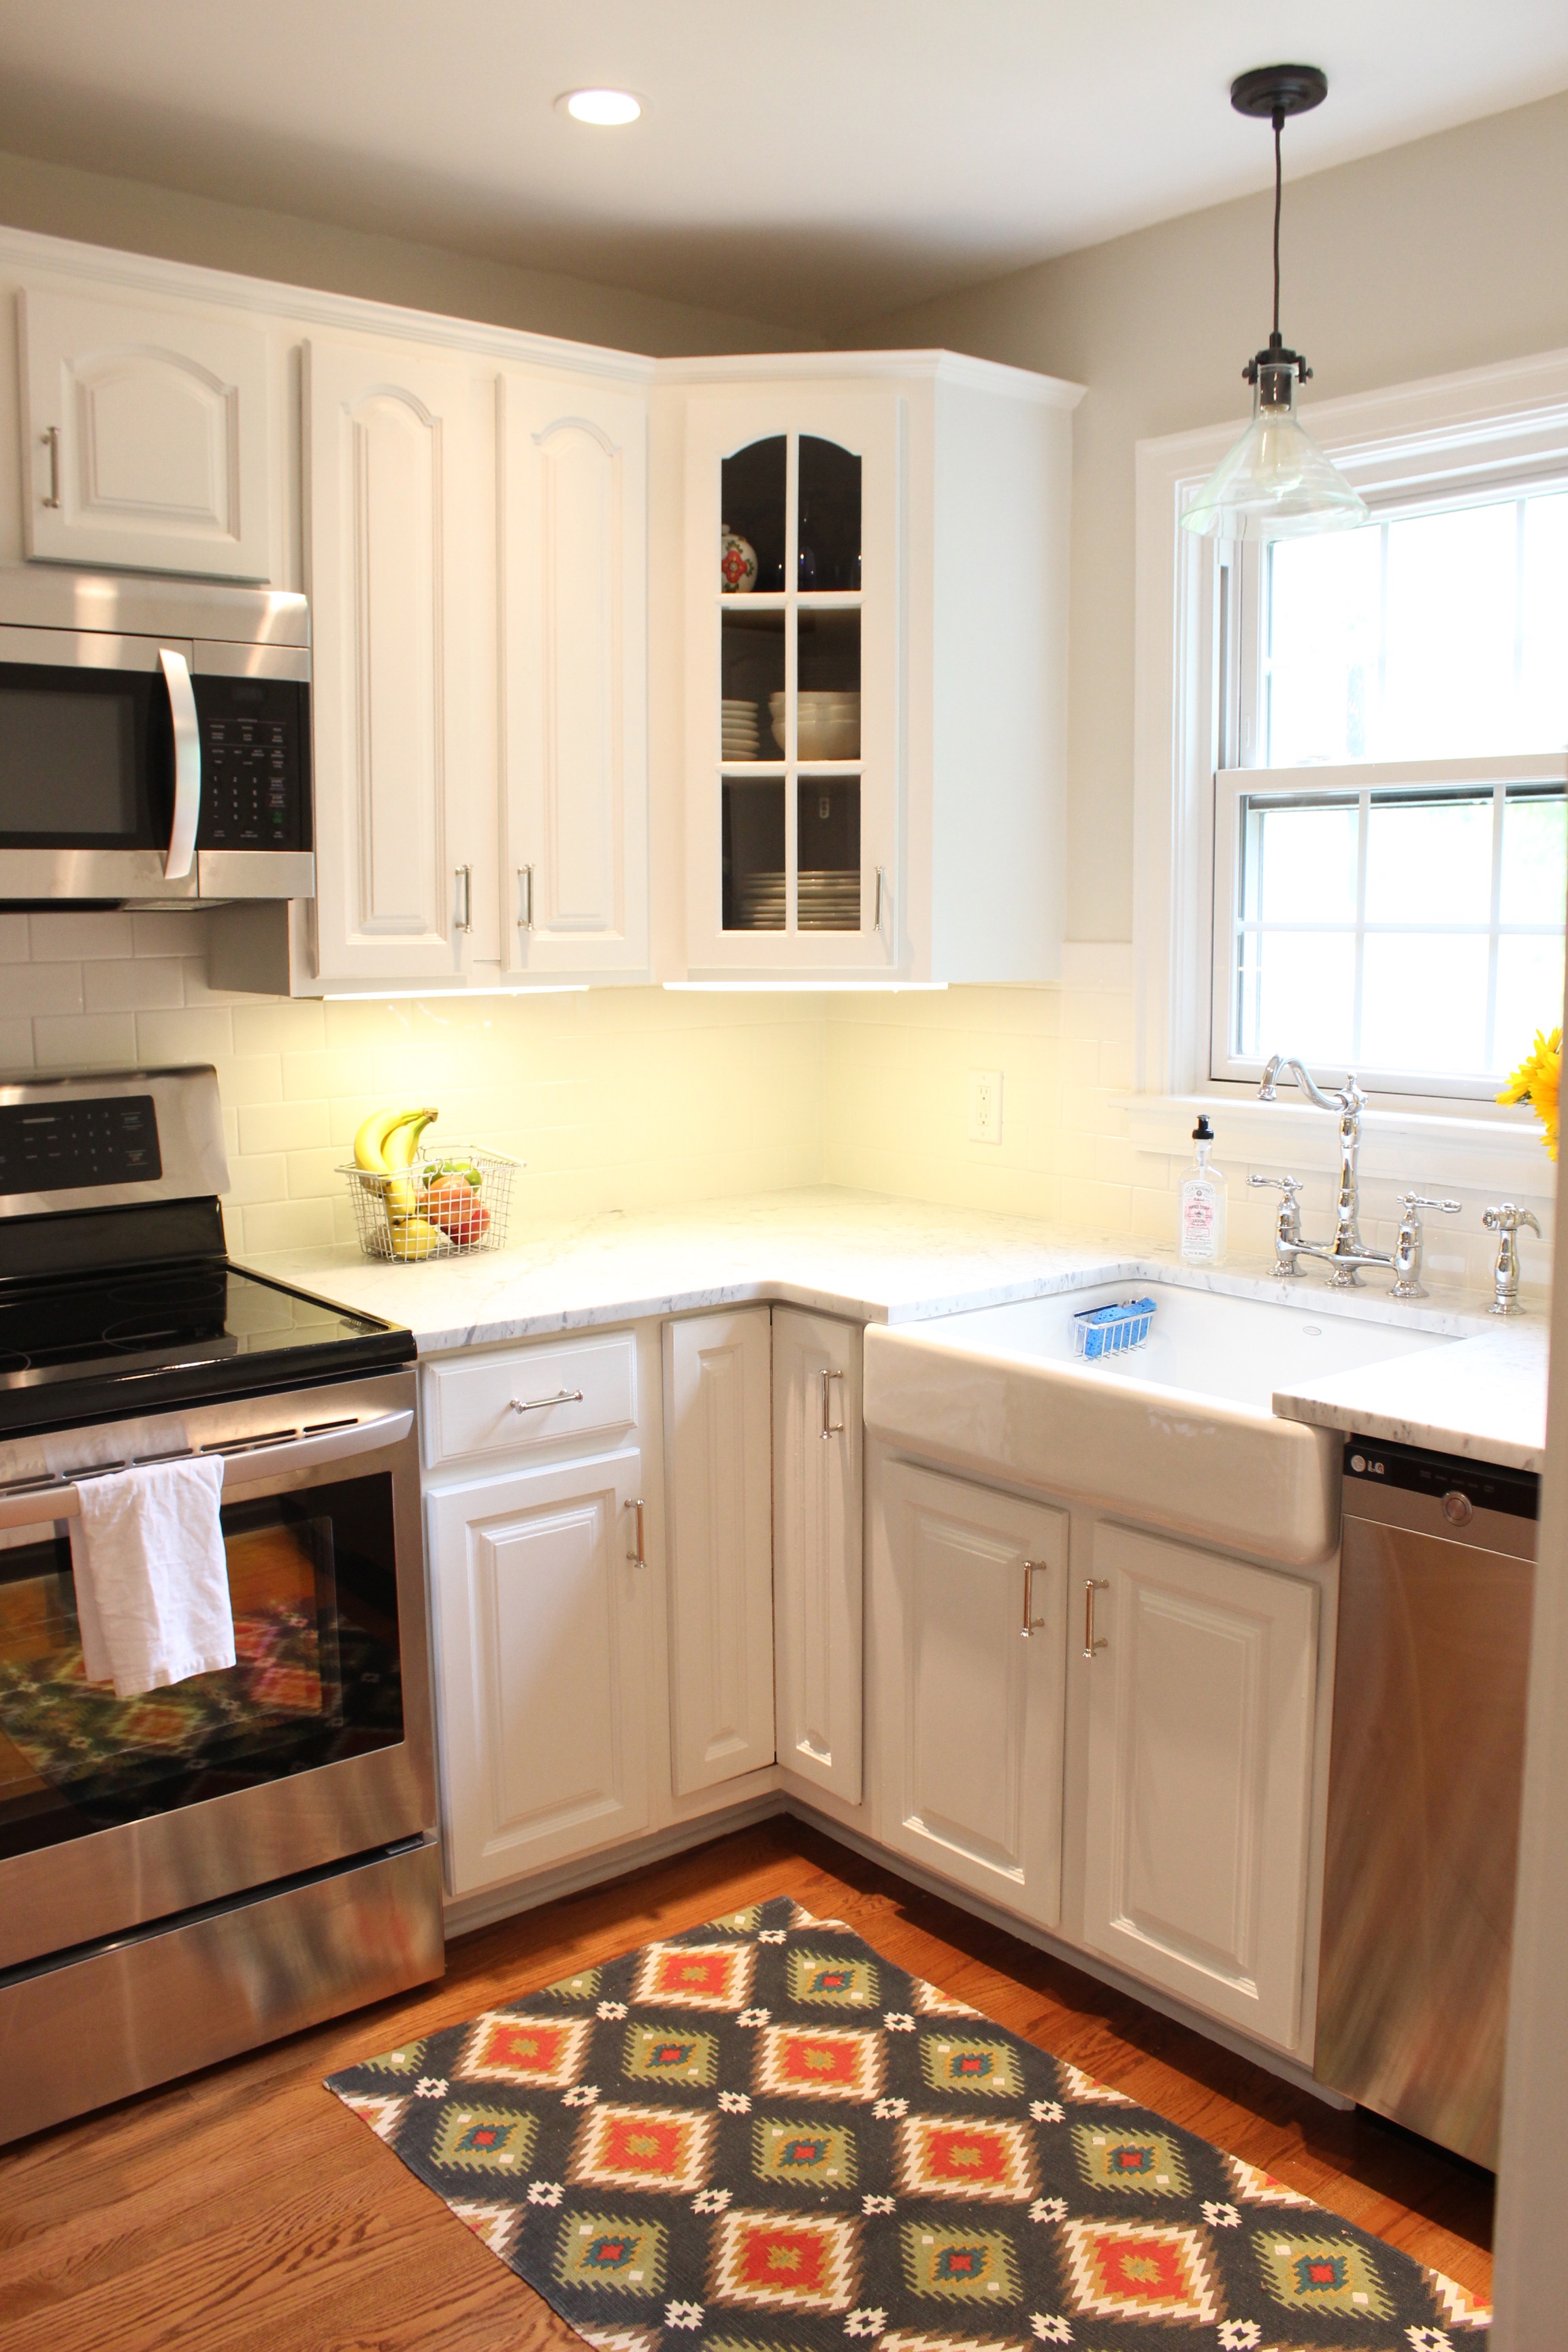
Here, you can see the beautiful wood floors. I think the thing we love the most right now is that slick backsplash. No more italian tiles. No more grit and grime from 10 years ago locked in the grout. Awesome.
BEFORE
AFTER
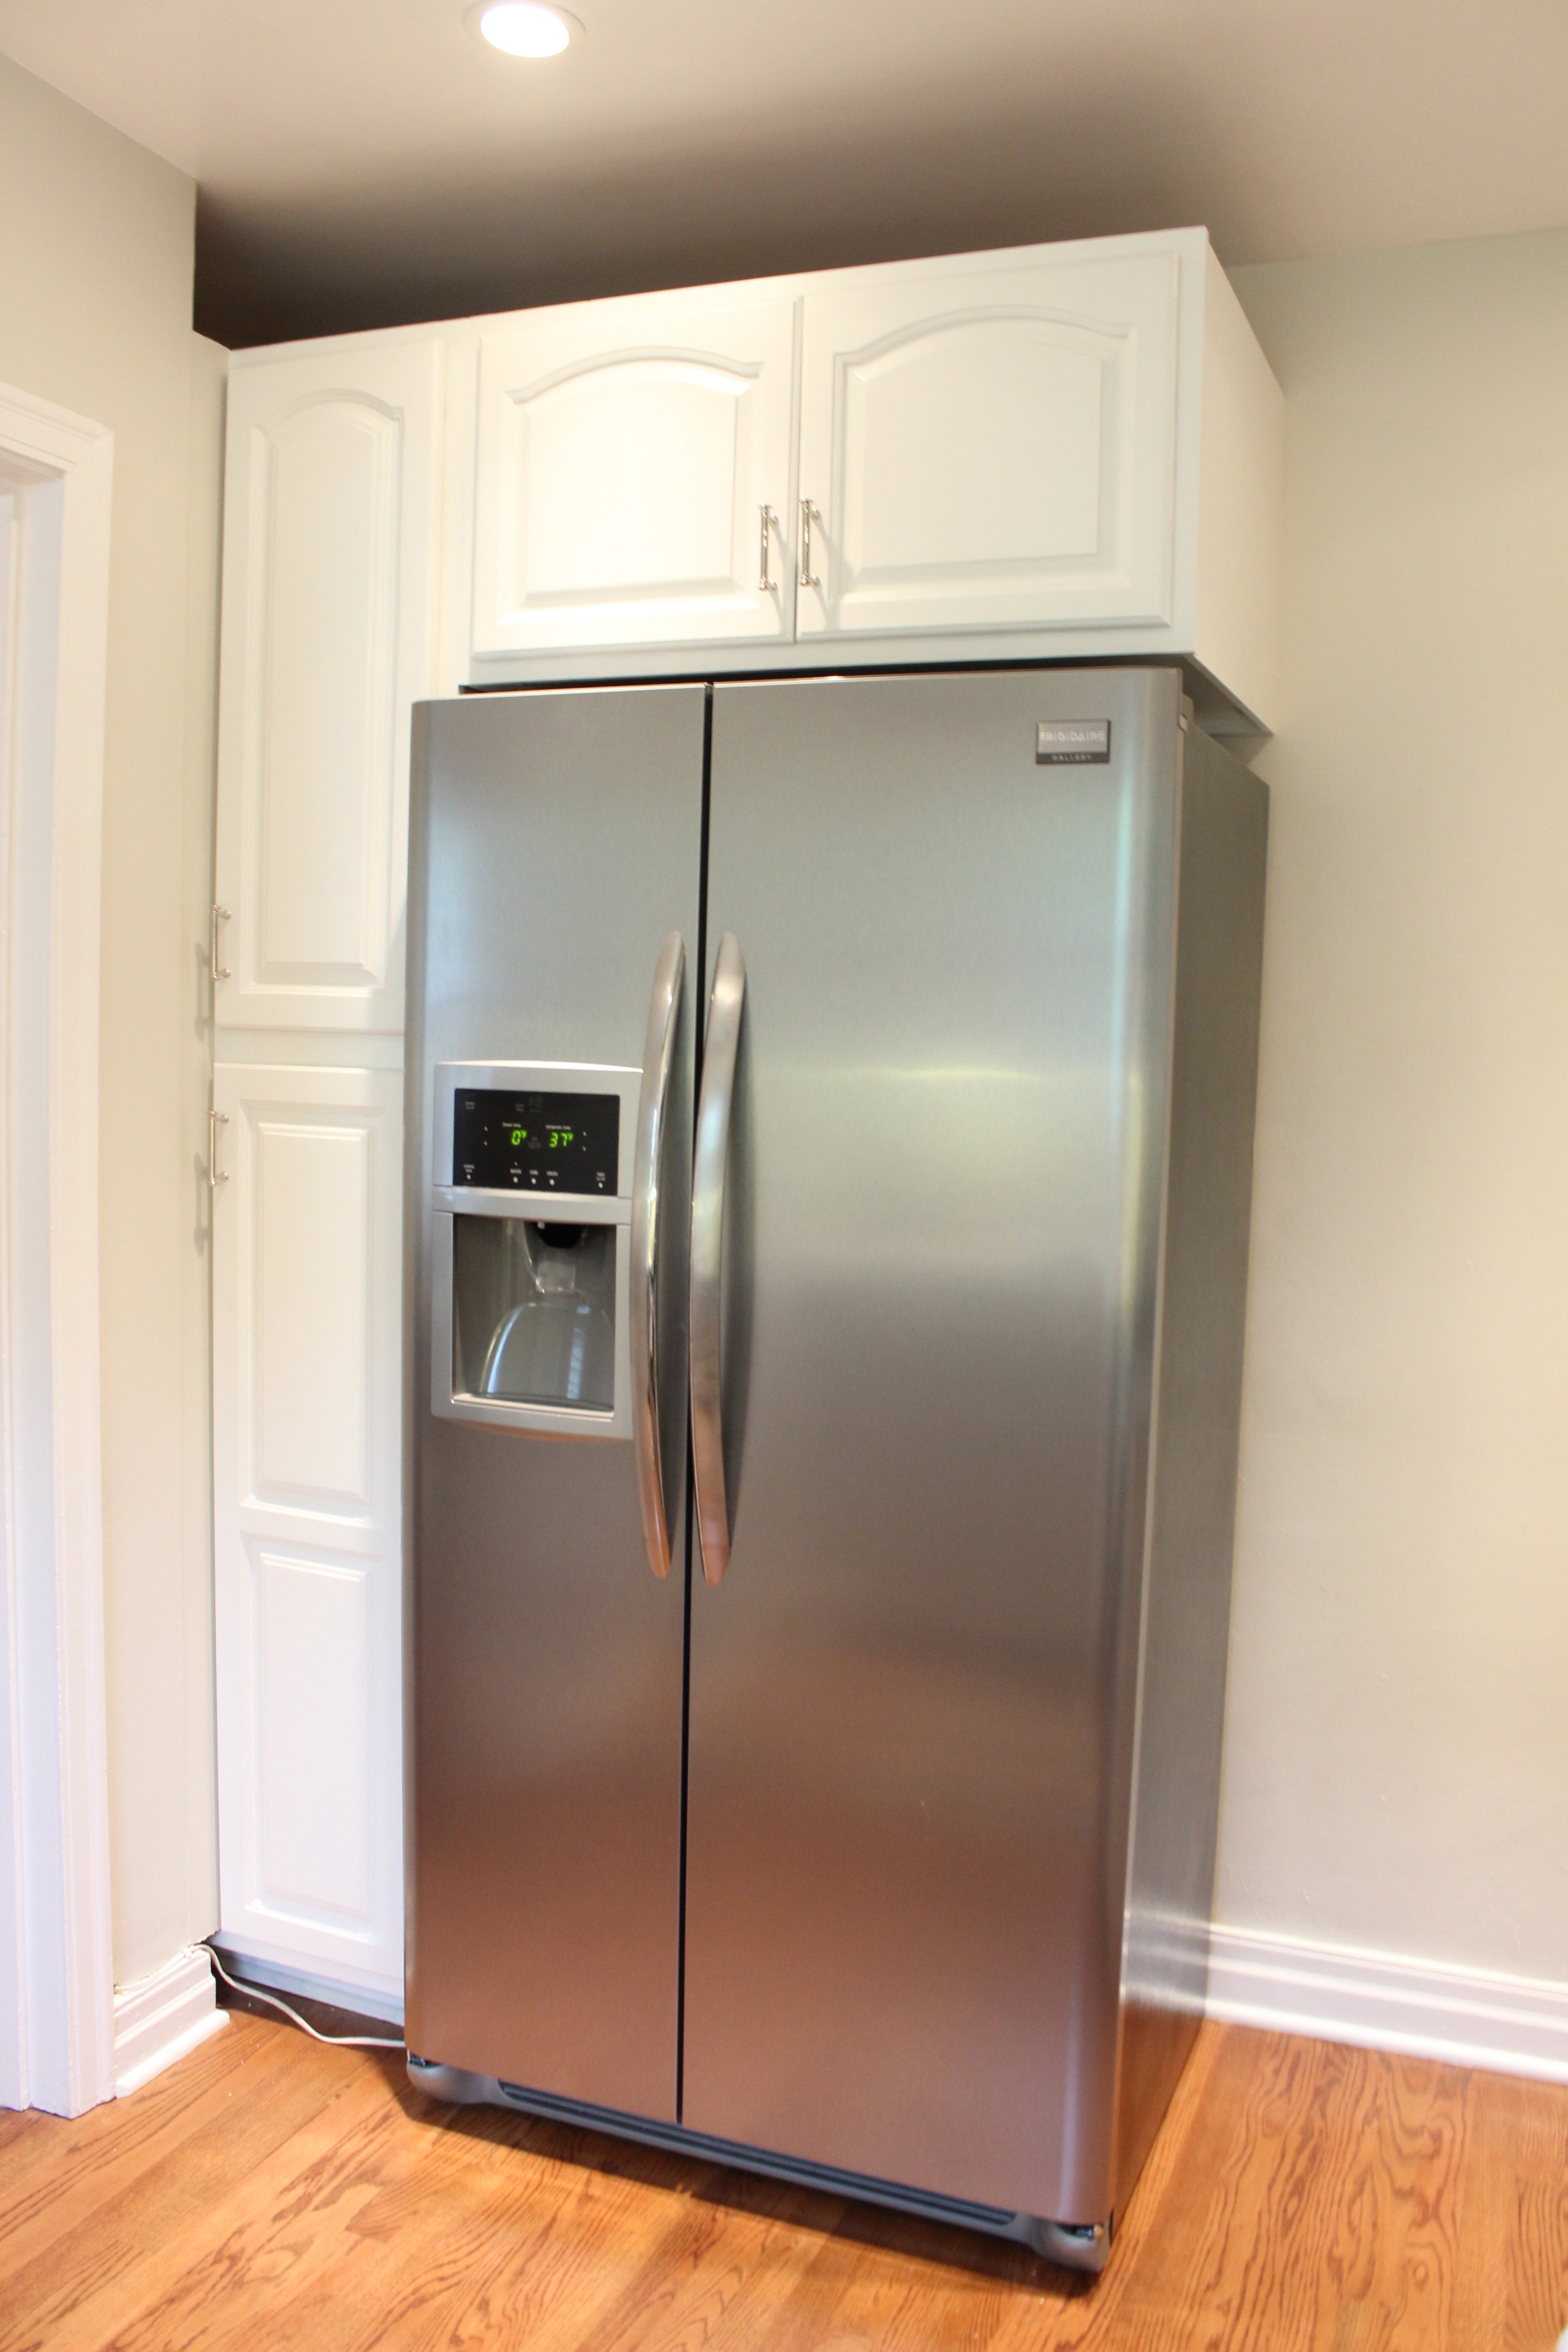
Counter-depth fridge (we're going to work on scooting it back a little bit more, once we tweak the floor moulding). Also, we're still going to add crown moulding to the tops of these cabinets, too.
DETAILS


So there you have it folks! Our brand new kitchen!
Patrick and I couldn't be more pleased with how it all turned out. It's the product of a whole lot of hard work, a few sleepless nights, and countless trips to Home Depot and Lowes. (We still haven't decided which store deserves our allegiance.)
If you're interested in all the details, here you go:
- It's really happening. (All the before shots)
- Our White Kitchen Mood Board.
- Choosing Counters. We ended up going with this marble slab from Nashville Granite and Marble. Our fabricator Stone World, did an excellent job. BUT FYI, the glue they use to install counters is very smelly. We had to crash at a friends' house that night, unexpectedly.
- Choosing Floors. We ended up going with hardwood, because it's "like jeans, it goes with everything!" We couldn't be happier. The folks at Verchota did a great install, and matched our other hardwood floors perfectly!
- Paint. Honestly, paint is the bane of my kitchen renovation existence. We went with Benjamin Moore "Oxford White" for the cabinets, and after I purchased a gallon of something we didn't end up using, we chose Benjamin Moore "Winds Breath" for the walls.... I think the light grey-beige "greige" offers just enough contrast with the white, but keeps the room airy and bright. I think? Our buddy Fitz helped with the painting—and he did a great job.
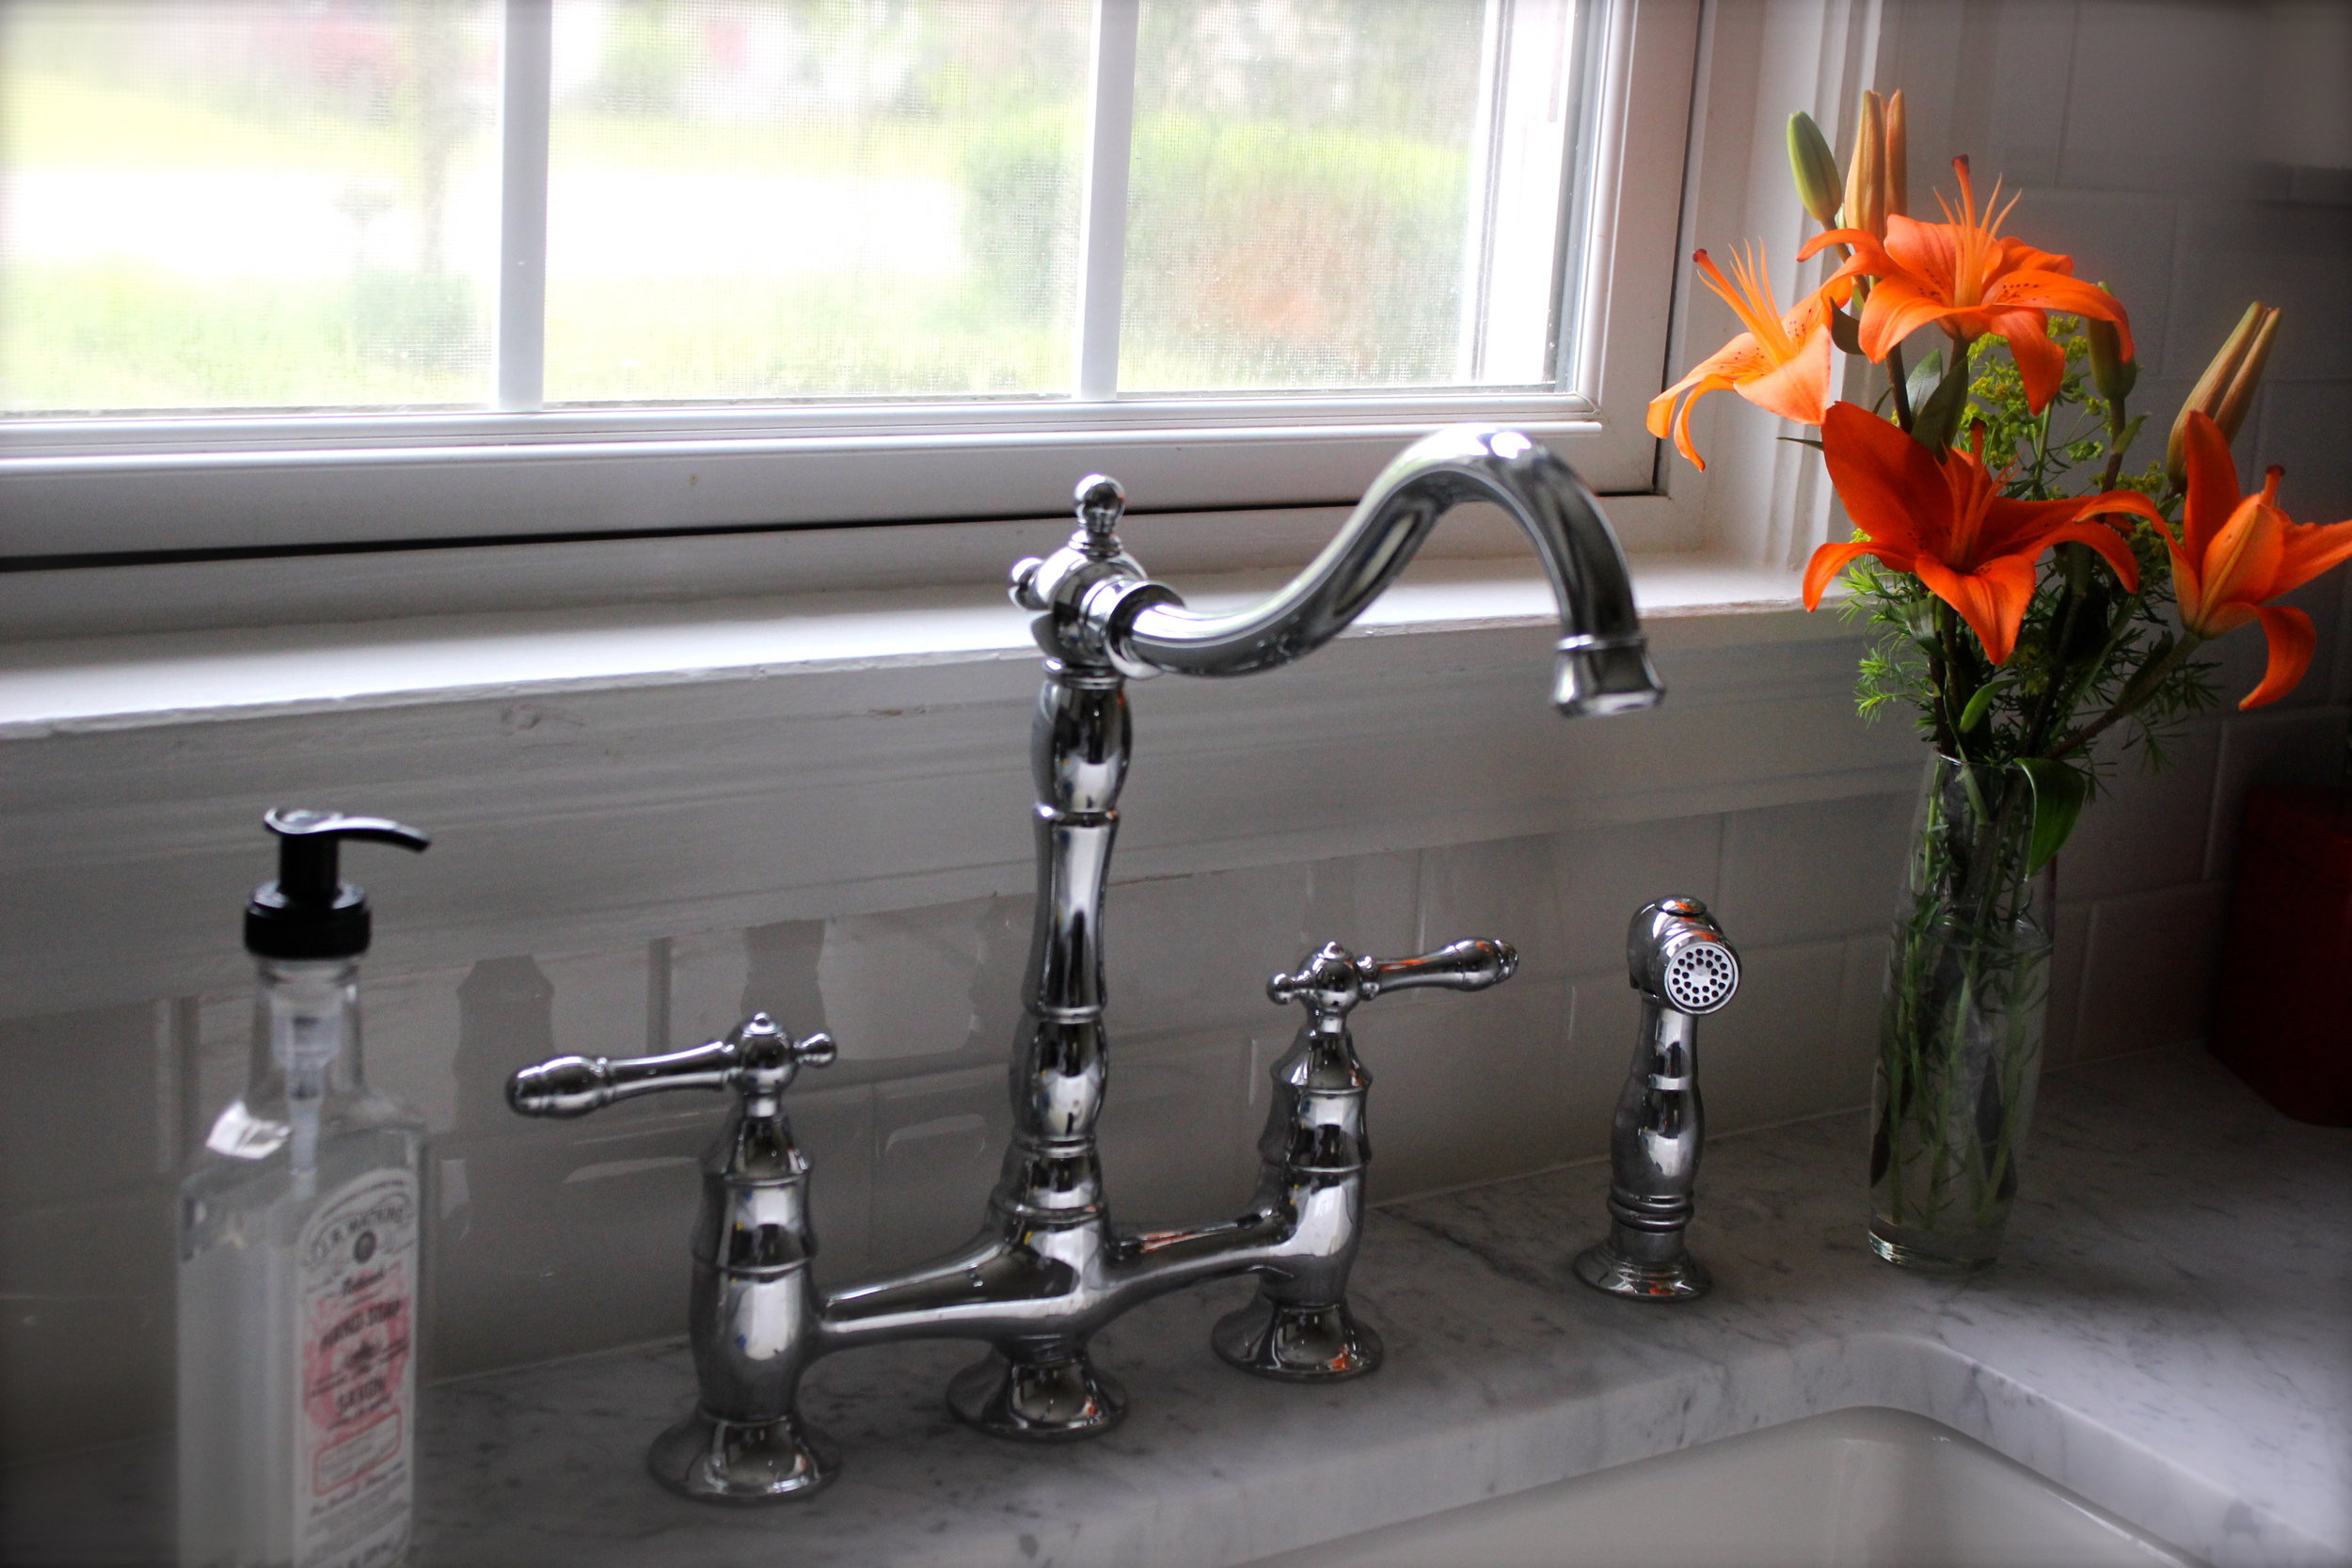
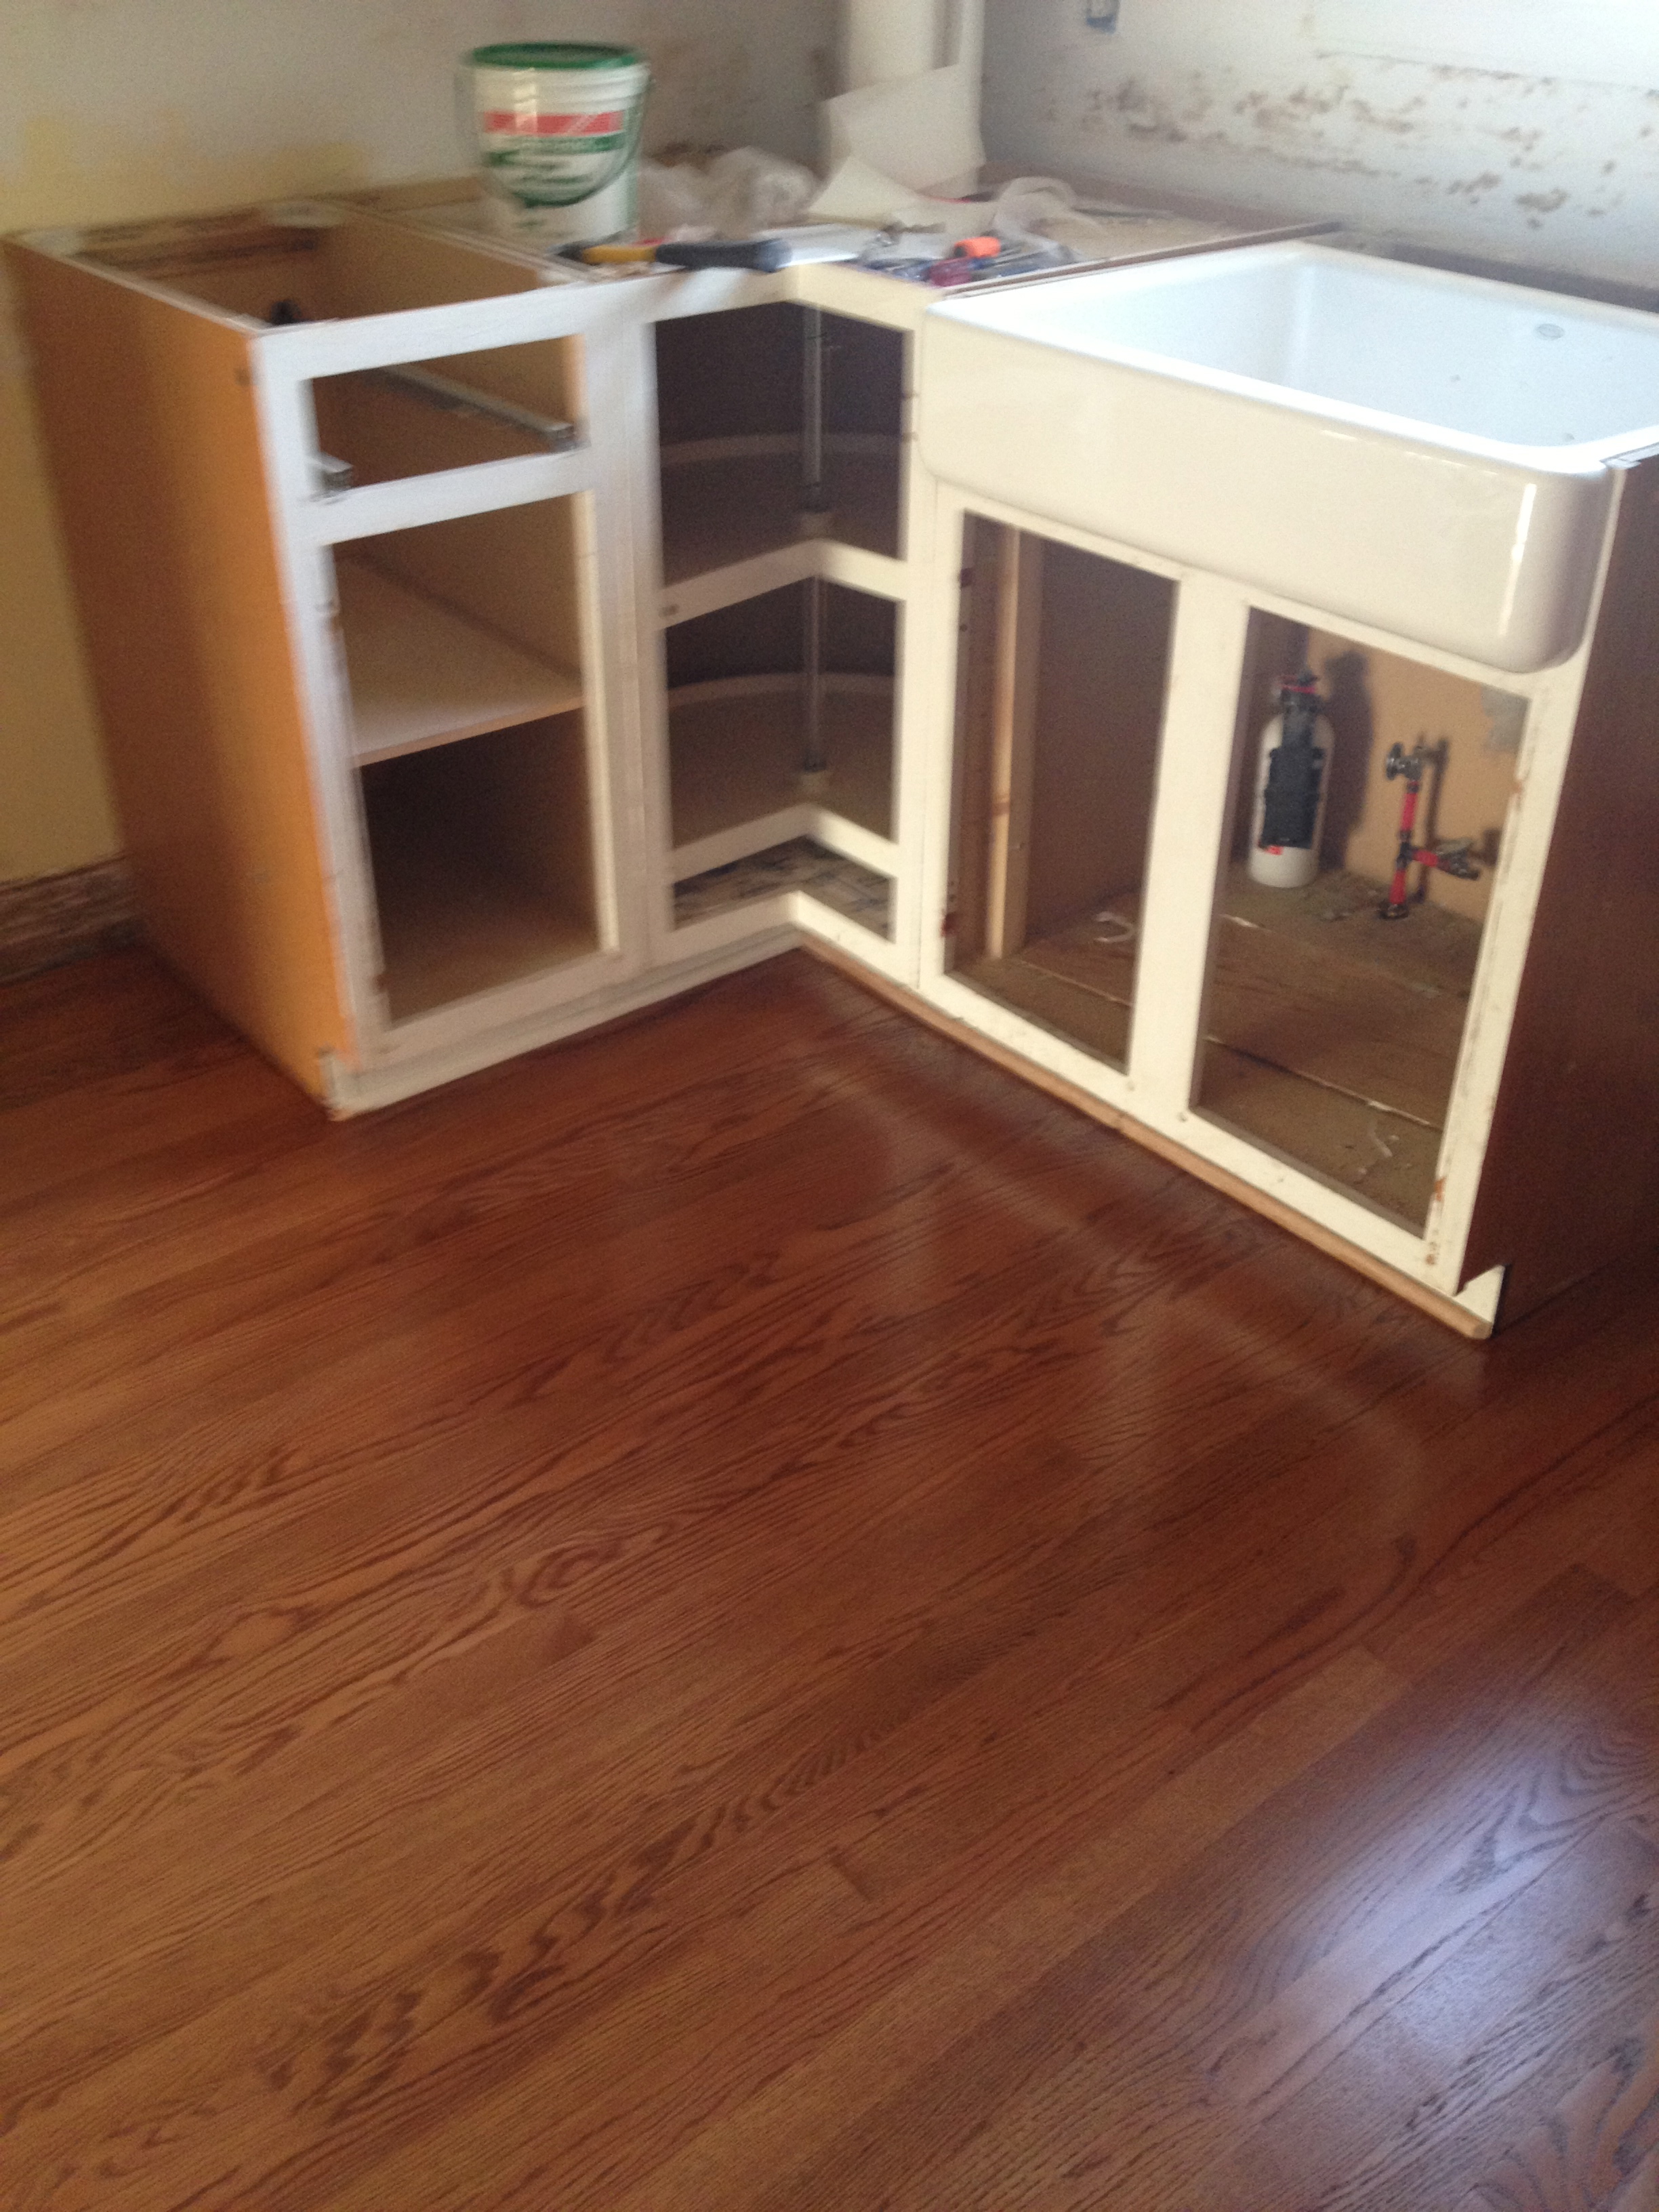
- THE SINK. My mom asked if we meant for it to stick out like that. Yes, mom. We did. We found this apron-front sink online, and fell in love. Most apron-front sinks require a special kind of cabinet, but this one came with instructions for how to retrofit an old cabinet for the sink front. Patrick and his dad worked hard to build in the supports so it doesn't come crashing through. The faucet is from Home Depot.
- Hardware. Unlike our "mood board" said, we went with polished nikel Allen + Roth pulls. I realized I didn't really want the cups because then you have to position your hand under the cup in order to open a drawer. I have been in the habit of opening drawers from the top—so these pulls don't mess with my habits. With the pulls, we didn't have to re-drill our cabinet doors, plus I think they work perfectly with all the other finishes.
- Backsplash. Our friend Matt Long helped us out installing the backsplash of white subway tile, and he did a great job. Be careful, though! Home Depot and Lowes have what seems like the same subway tile, but they are different colors. We went with the Lowes version.
- Crown Moulding. A local carpenter, Ben Williams, helped us install the crown moulding. Super helpful, because we couldn't have done it alone!
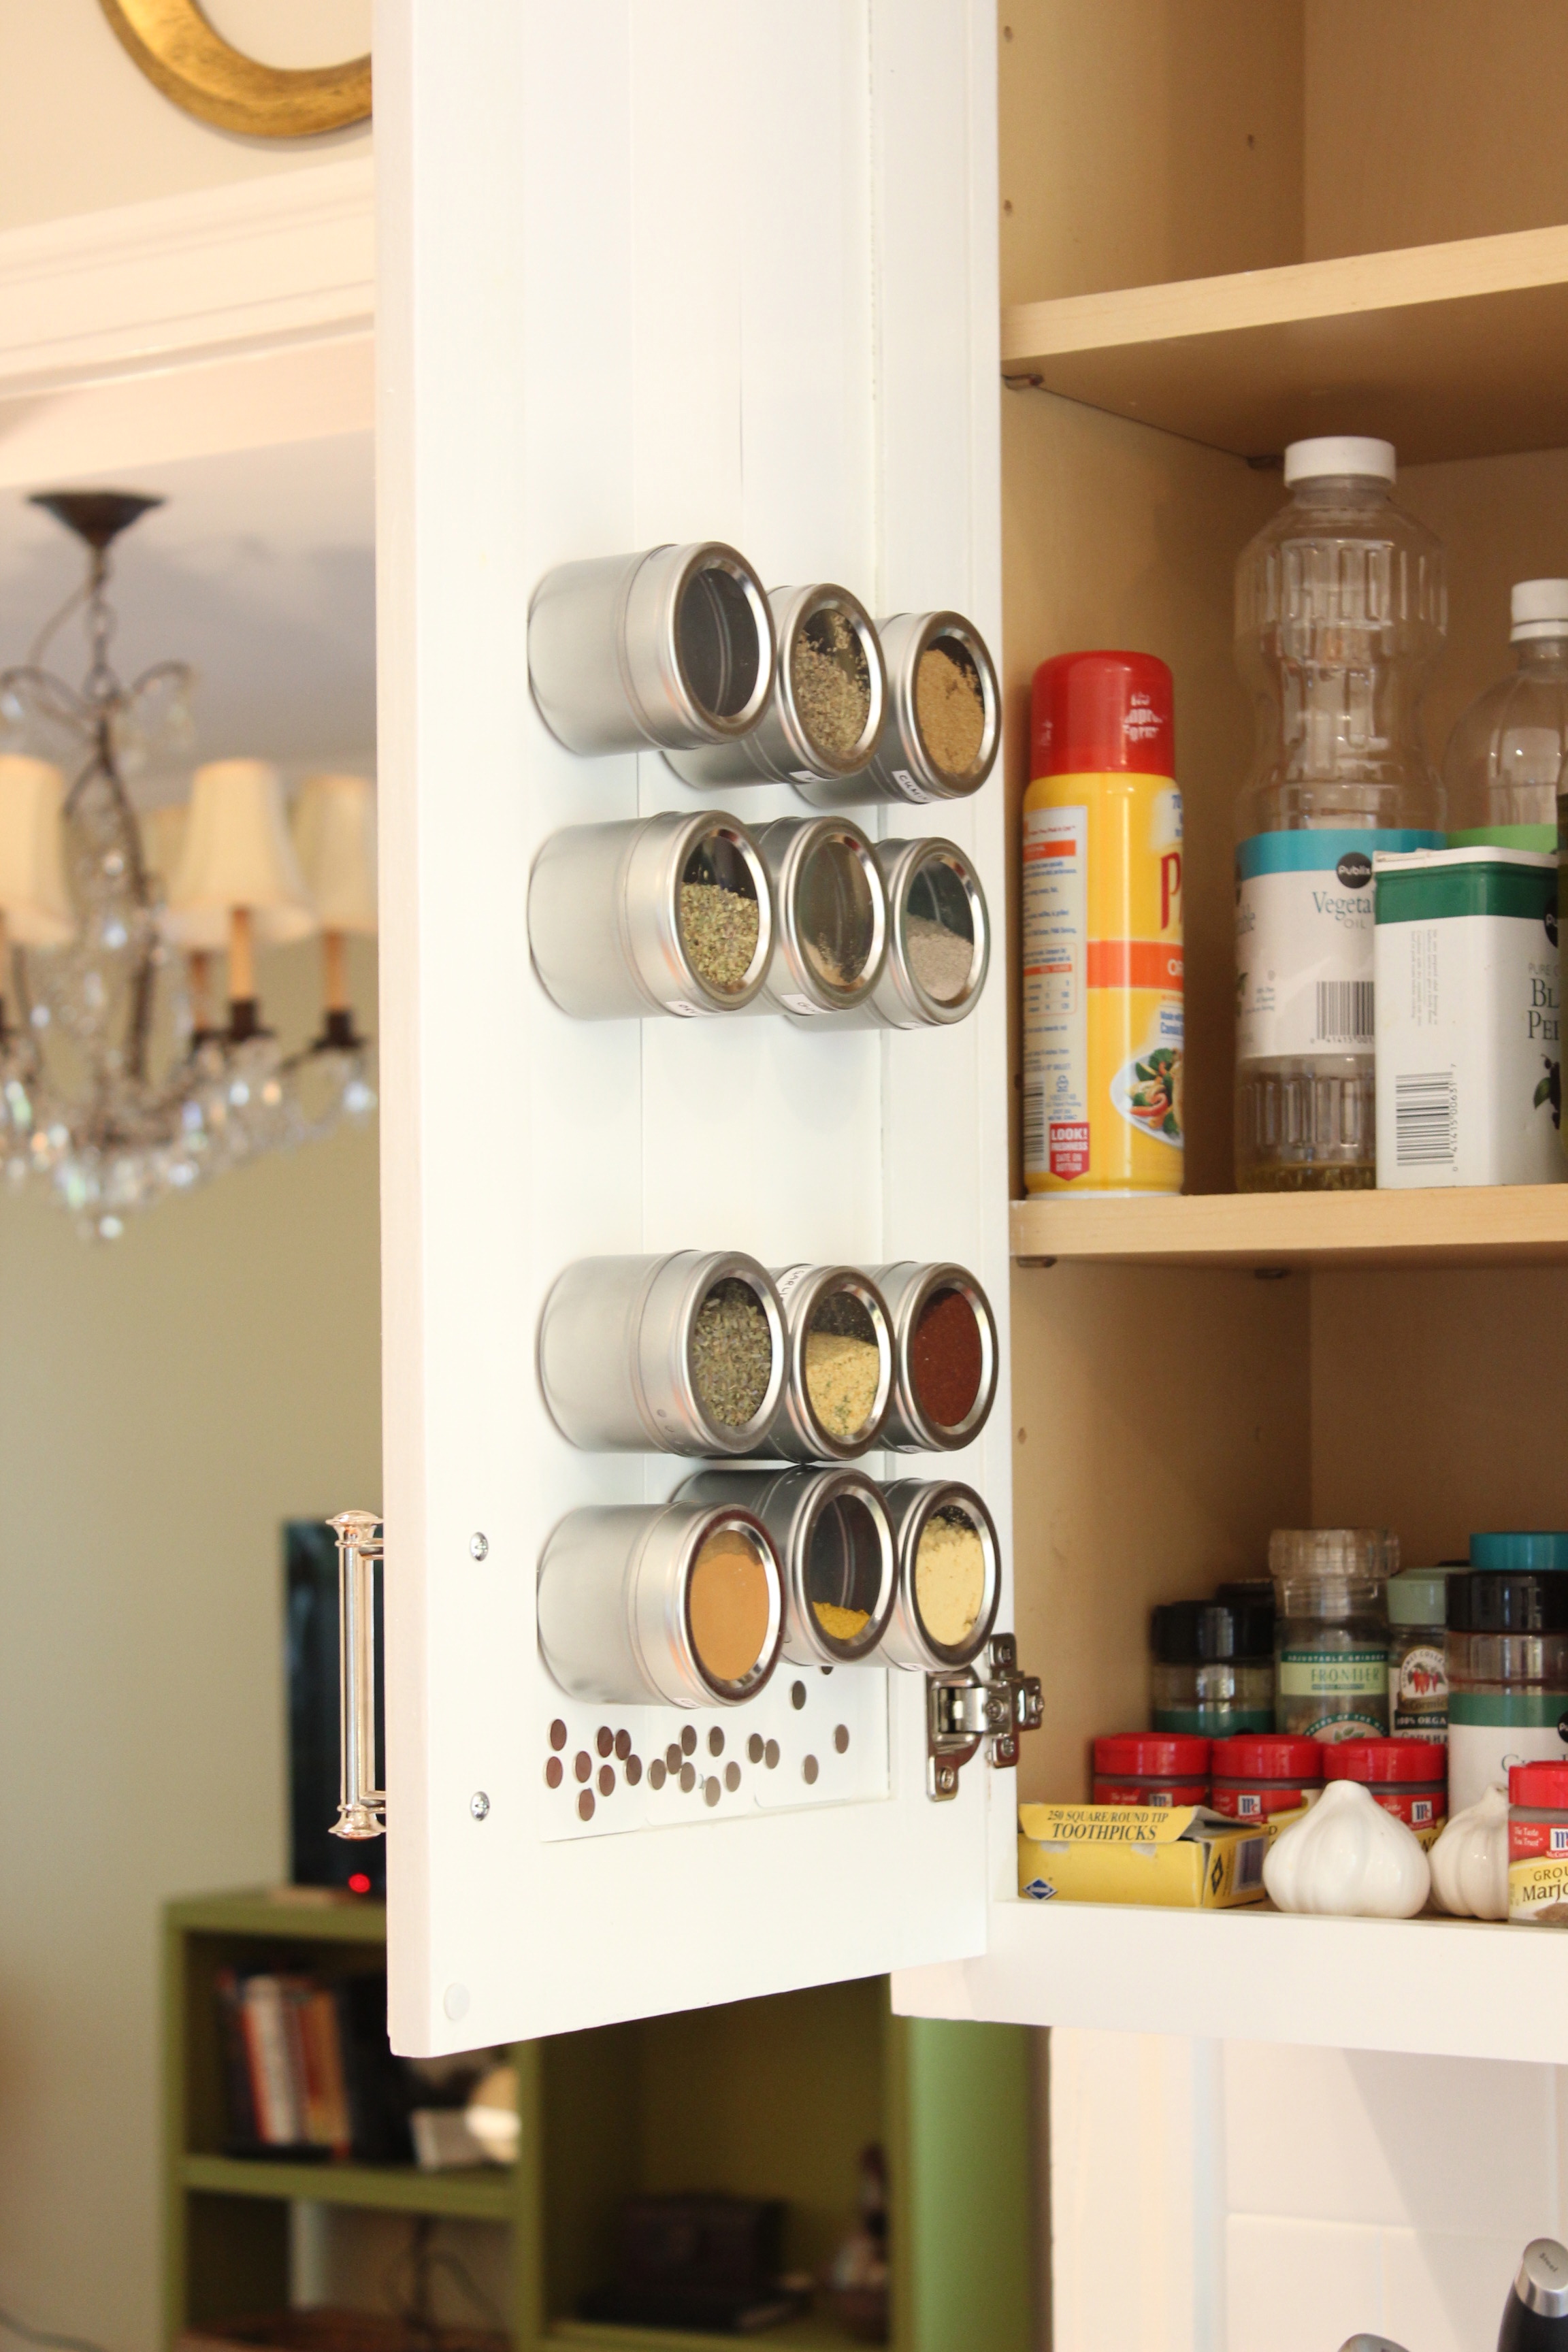
- Magnetic Spice Jars. I get that these are kind of trendy, but aren't they so cool!? Magnetic strips and magnetic jars can be found at the Container Store.
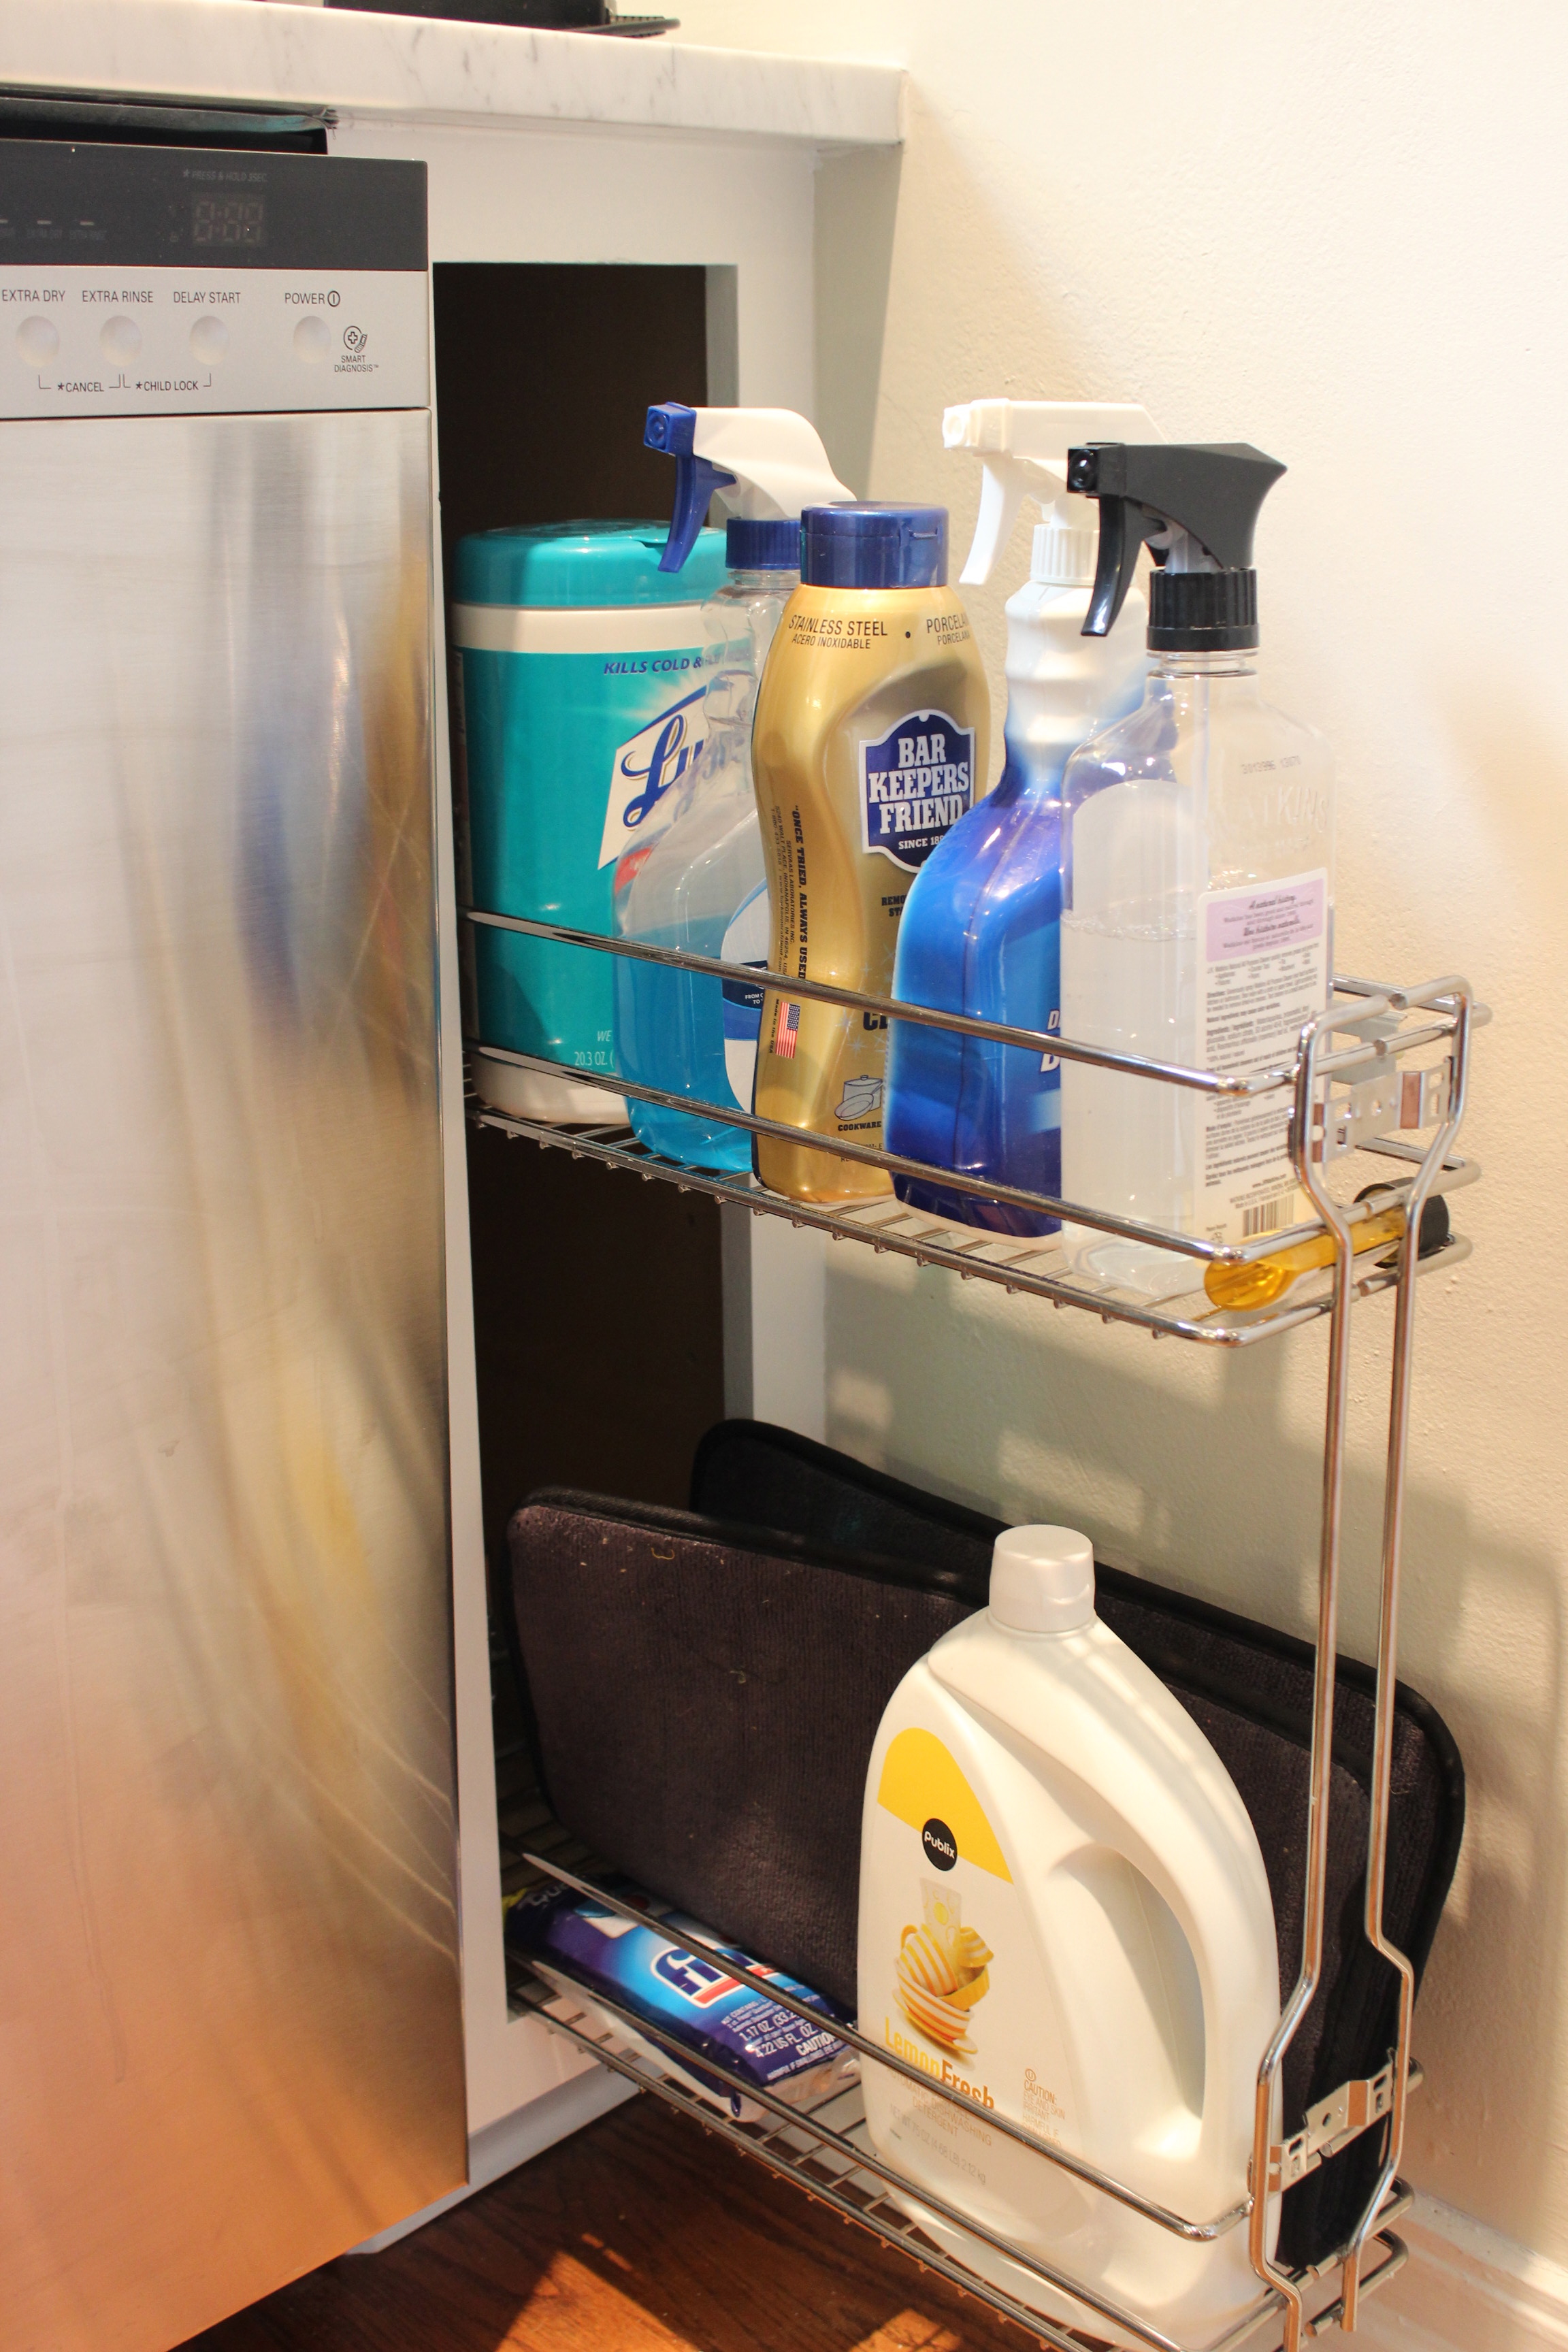
- Rolling Cart. Patrick found this online and it was a jerk to install. But it's awesome, and now we can actually use that little space by the dishwasher. We made a mistake on the door that attaches to it, so we'll have to install it in a few days after we fix 'er up!
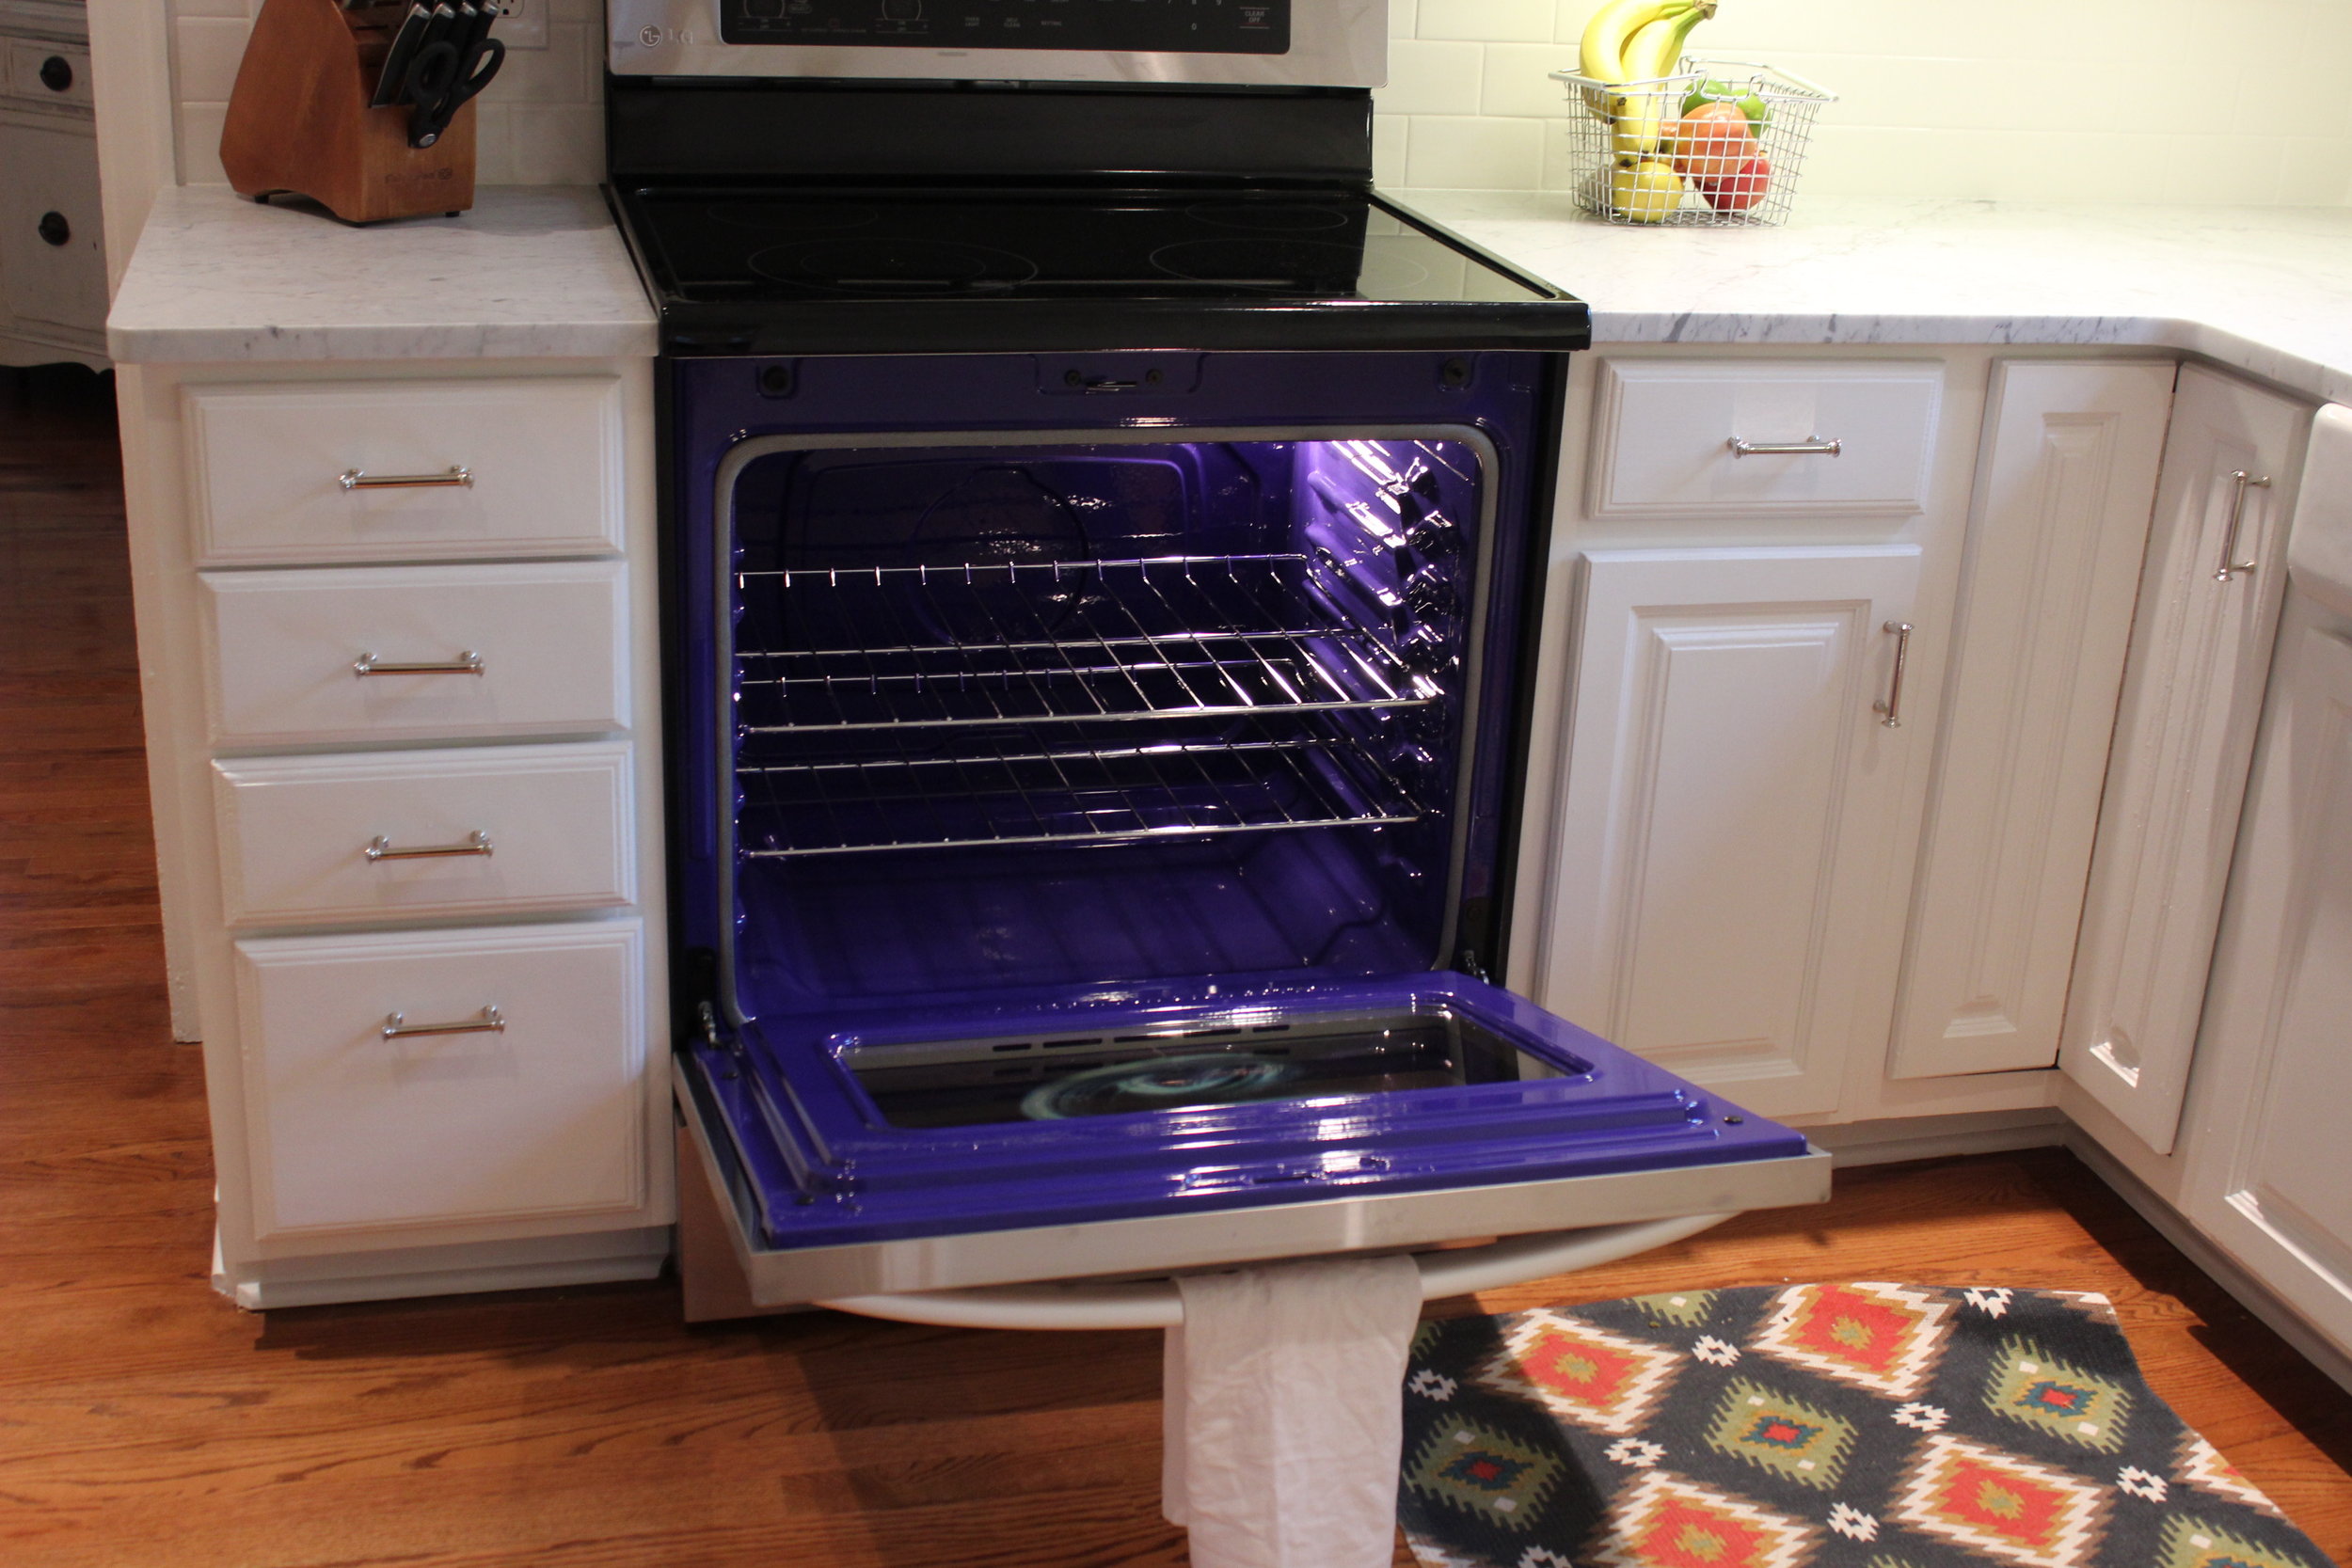
- APPLIANCES. This was a fun part. We went with the counter-depth Frigidaire Refrigerator, an LG stove (with blue interior. what.), LG Microwave and Dishwasher. We also installed an extra quiet disposal... which is a lifesaver, because we didn't have one before!
- Electrical. Our electrician, Steve, helped install new can lights and this pendant from Home Depot. We LOVE them!
It's quite possible that I forgot something. So if I did and you're curious about something we did... just leave a comment—I'll try to answer it to the best of my ability. We have some art work coming in the next few weeks, so I'll keep you updated on all that!
*Phew!* that was a doozy! Thanks for sticking with us through all that mess!
It's DONE!
Over the last few weeks, I've received plenty of texts, e-mails and tweets asking: is it done?
Finally, I can say... YES! The kitchen is done!
But before I put up photos showing off (because yes, it is showing off) our new digs... I promised that we'd give friends an opportunity to see it in person. So if you're in Nashville, and you want to come see it, BYOA, and come over tonight!
**Yep, as weird as this is, I'm announcing our own open house via blog. Welcome to 2013.**
The Kitchen: In Progress
in HOME
My life is all over the place right now. Photographic evidence:
 Patrick and I ordered six cubic yards of soil for our garden beds. We're new to the whole "cubic yards" thing. Anyone need some soil?
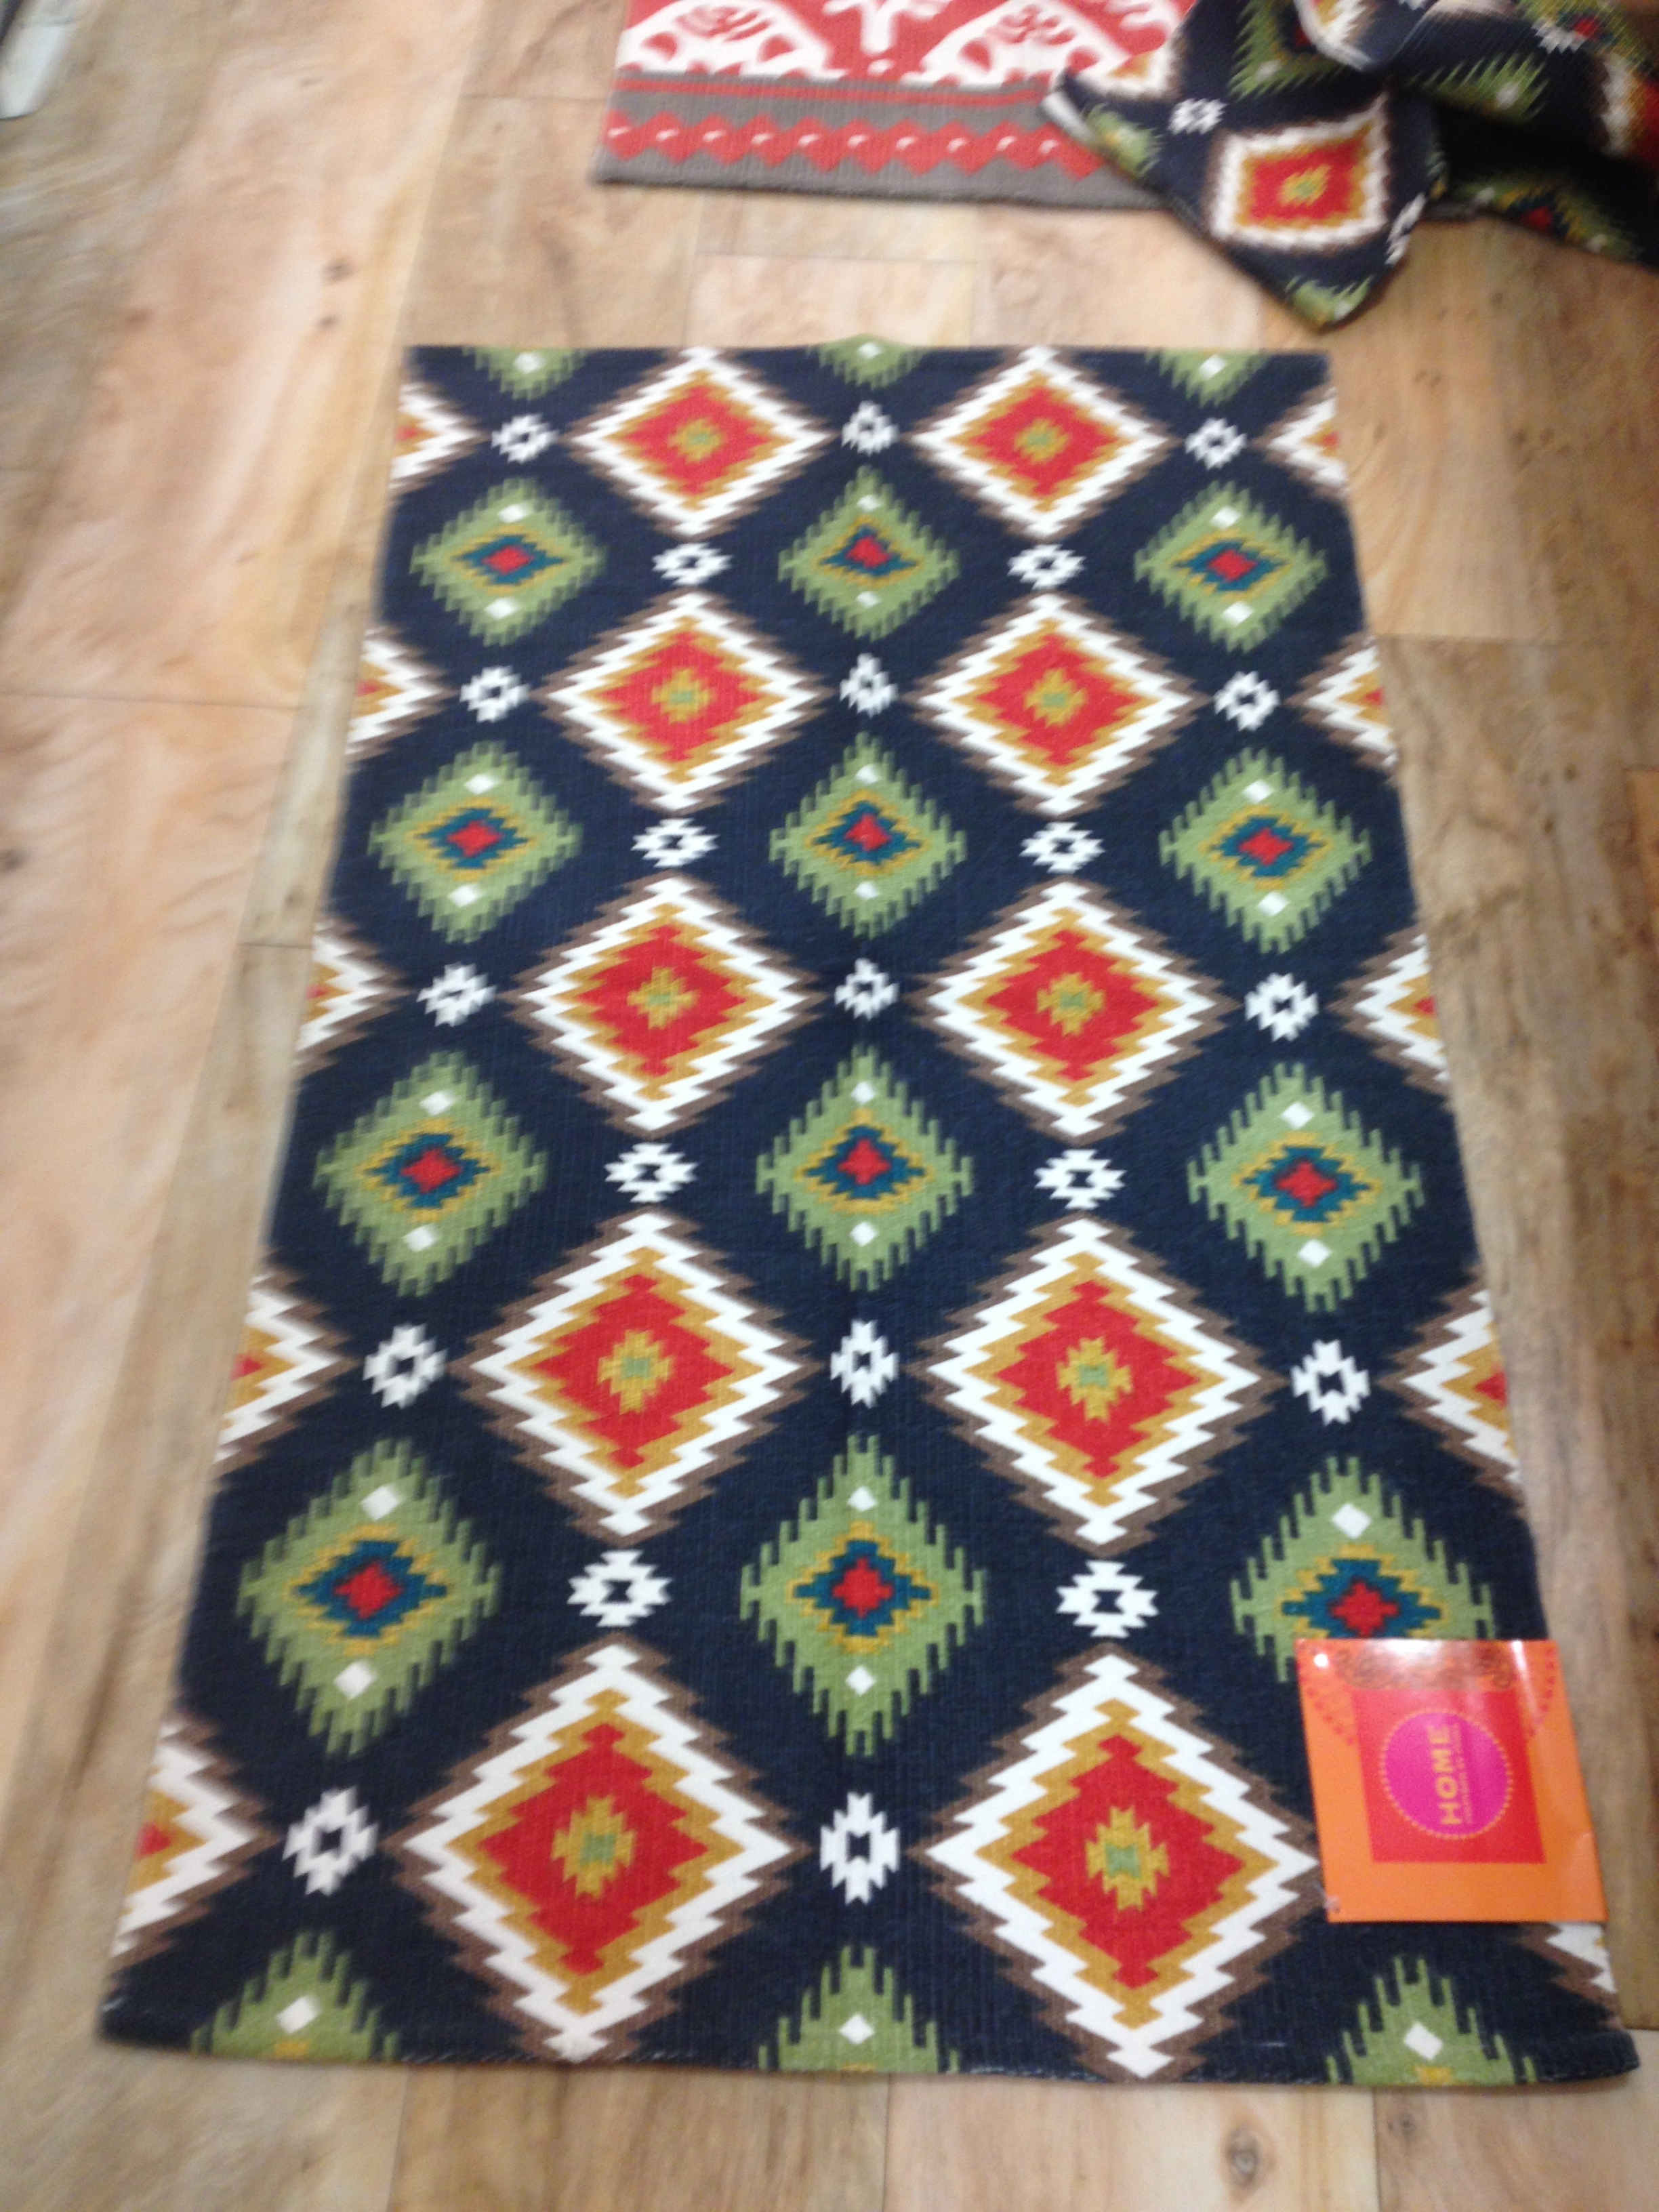
I think I found a rug for our kitchen at TJ Maxx. $16. Boom.
Hardwoods are in and beautiful.

My hair is getting longer and I wore this to church where Randy Draughn finally came back from sabbatical and helped Jesus smash my castle to pieces. More on that later.

We finally put up an American flag!! (That was part of our yard plan)

The electrician came and installed can lights and this pendant.
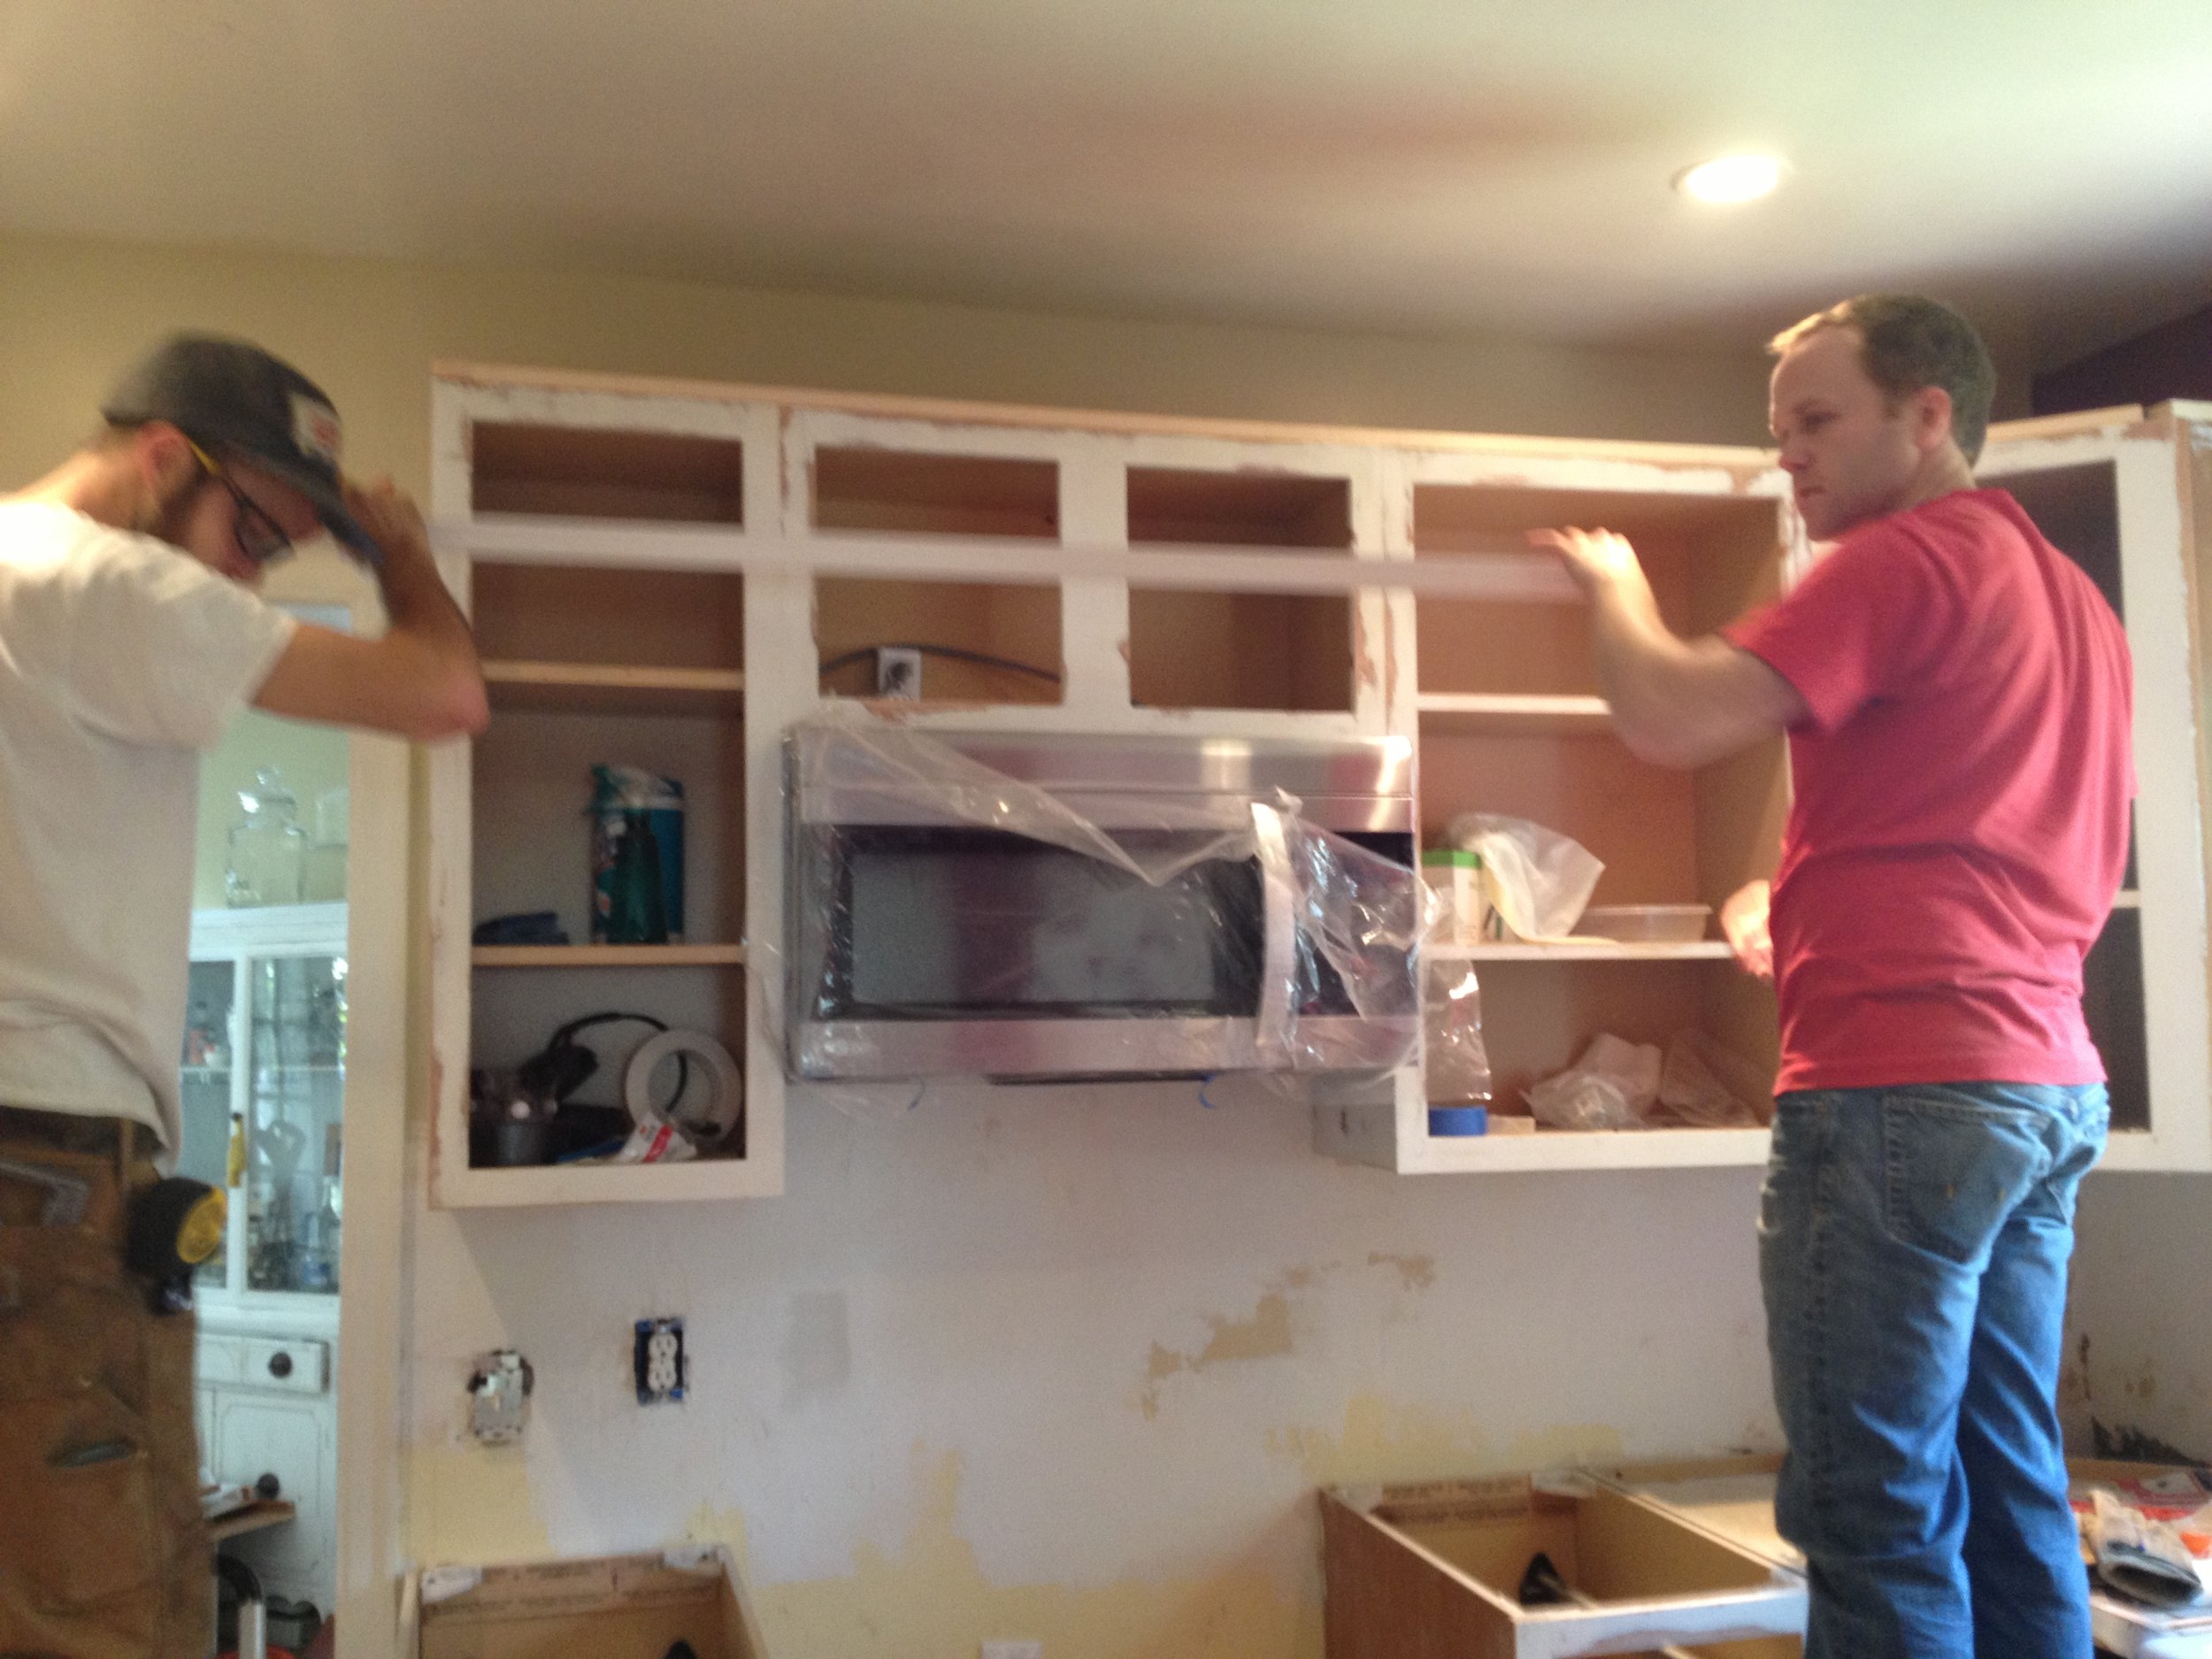
We have a microwave. And our über talented carpenter friend, Ben Williams, came by to help install some crown molding on top of our "nekked" cabinets.

I painted cabinet doors (Oxford White, Benjamin Moore) with my friend Amber, and it took ALL WEEKEND LONG.
... we're getting closer!
(I apologize for blurry images... no excuses.)
I Like Wood, Part 2: Installing Hard Woods
in HOME
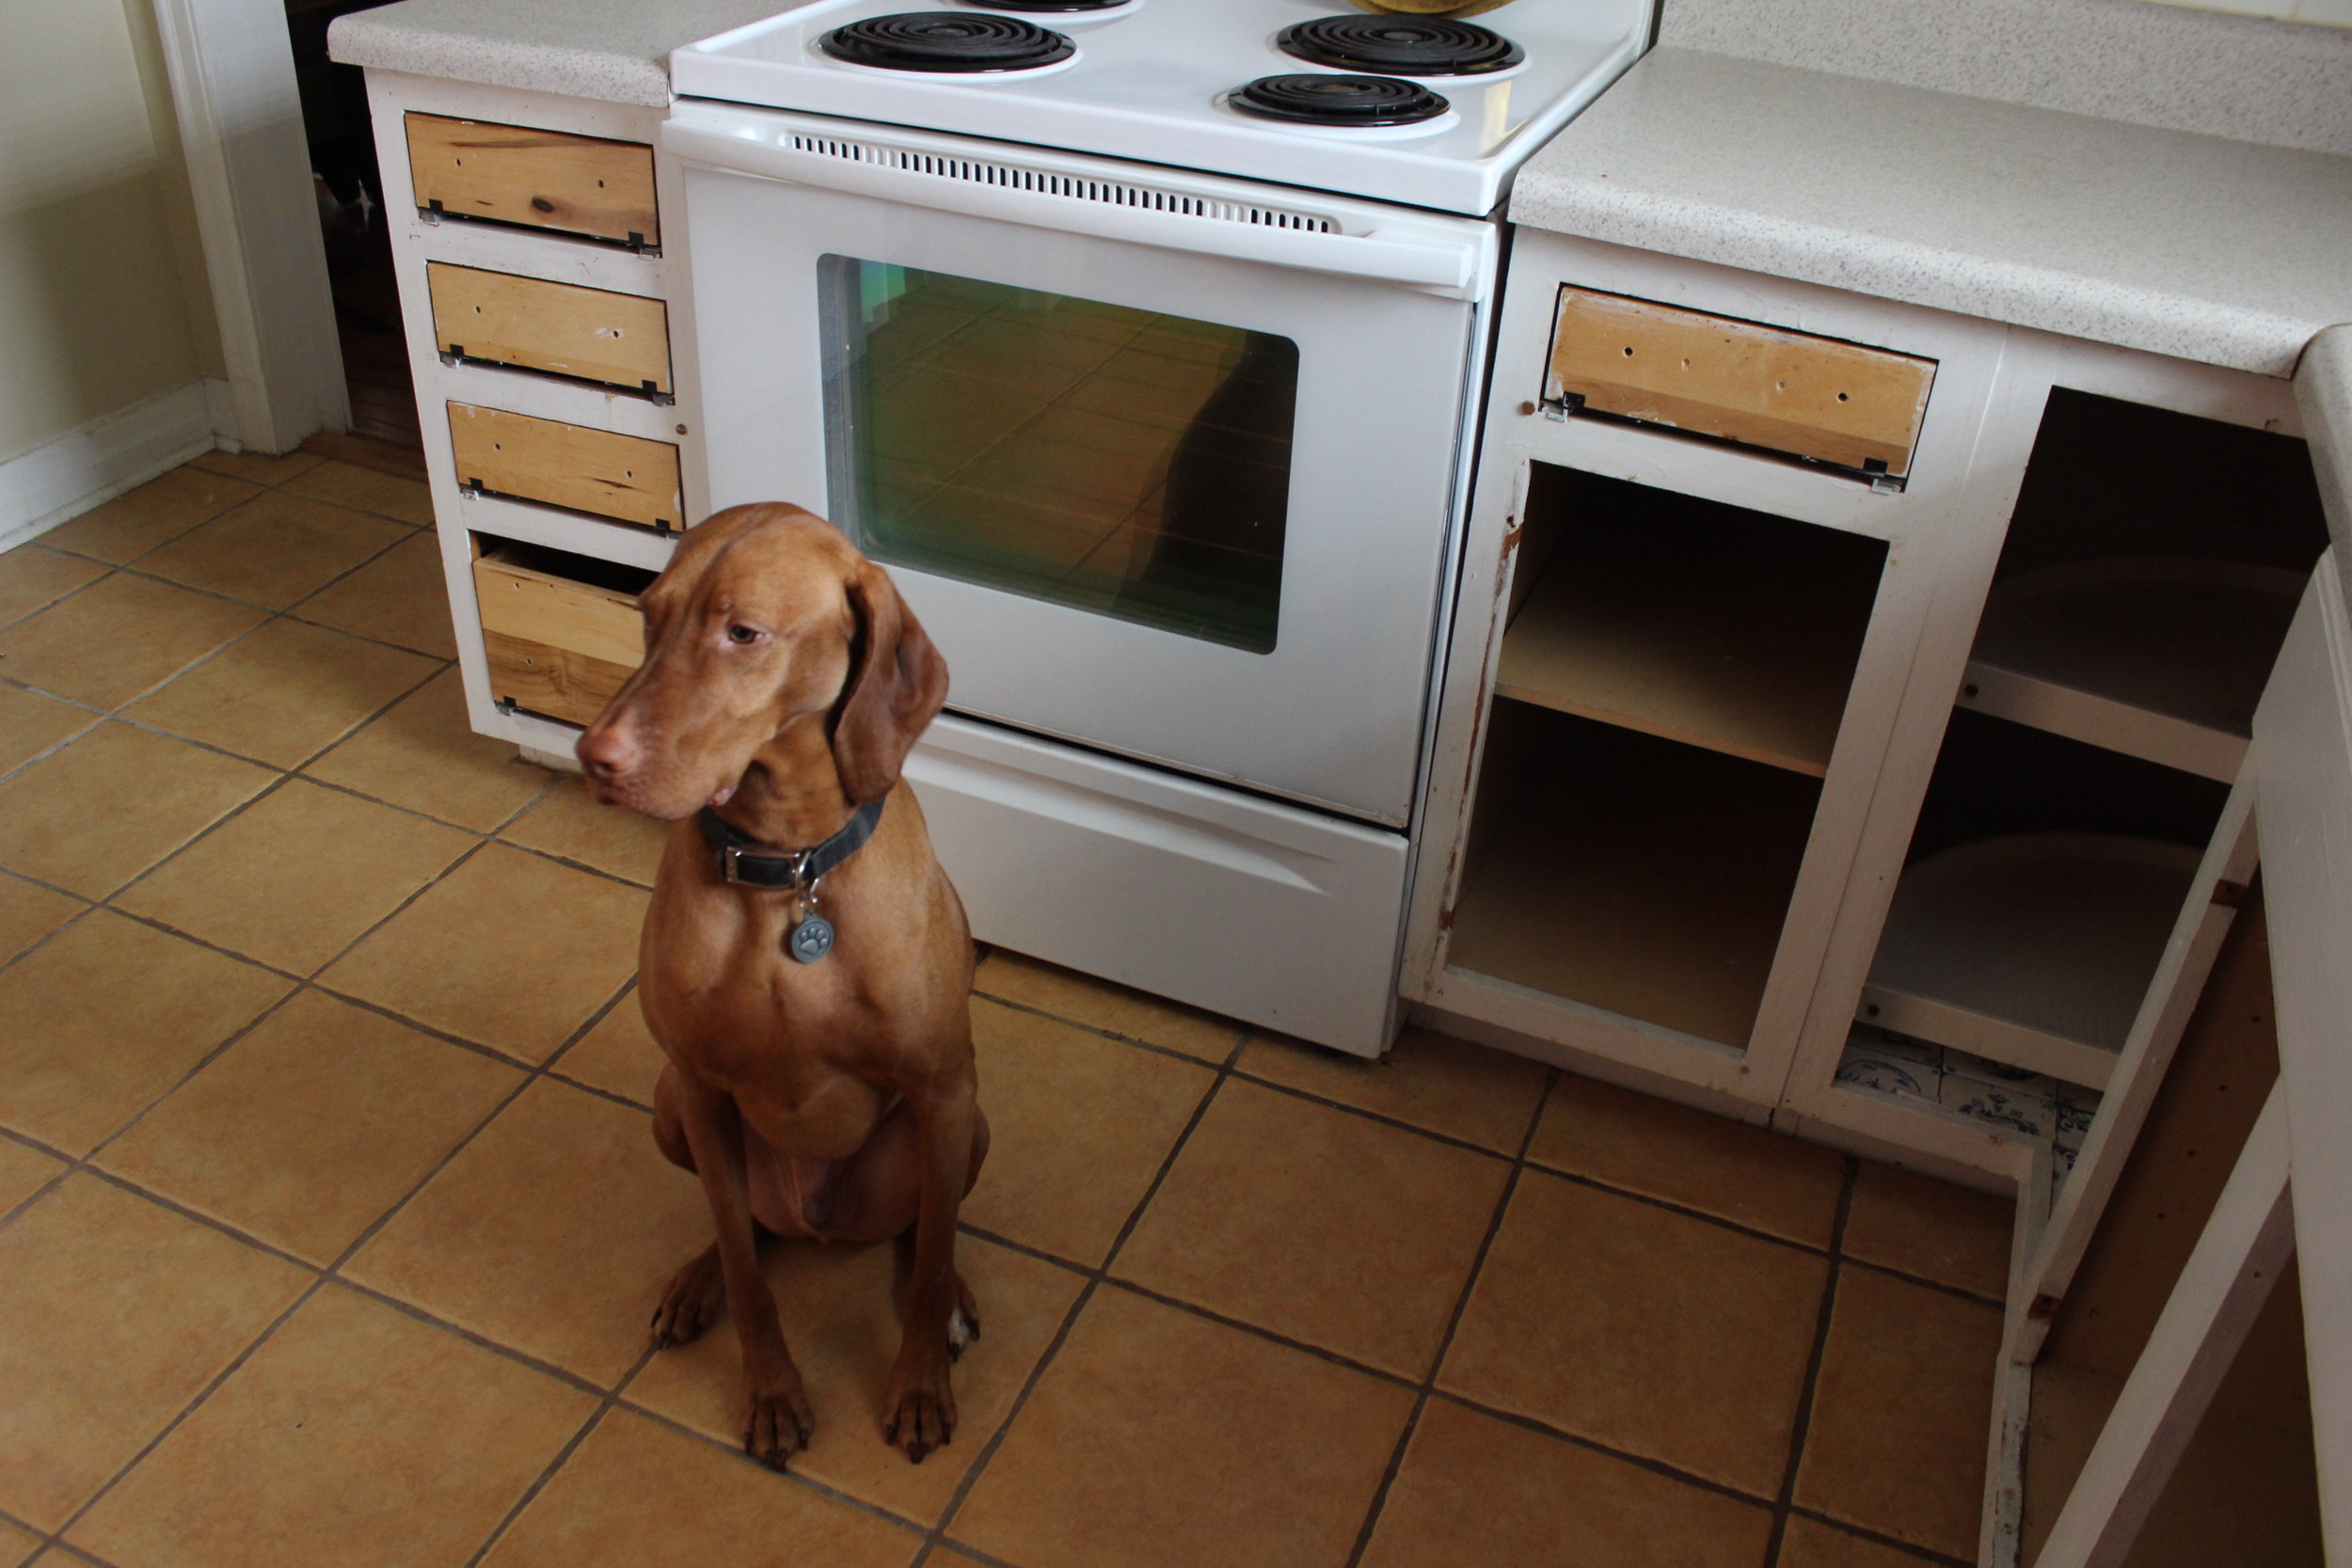
Life in my world is absolutely bonkers right now. We're not living at home because we've demolished the one room that allows us to eat. Pursuit Magazine just published the most complicated and rewarding story I've ever written. And ... I can't think of a third thing because my brain is so fried from it all. (It's a good fried. But it's got that greasy, mushy feeling none the less.) So here's the house update if you've been curious...remember how I told you that I like wood?
Here's proof.
BEFORE:
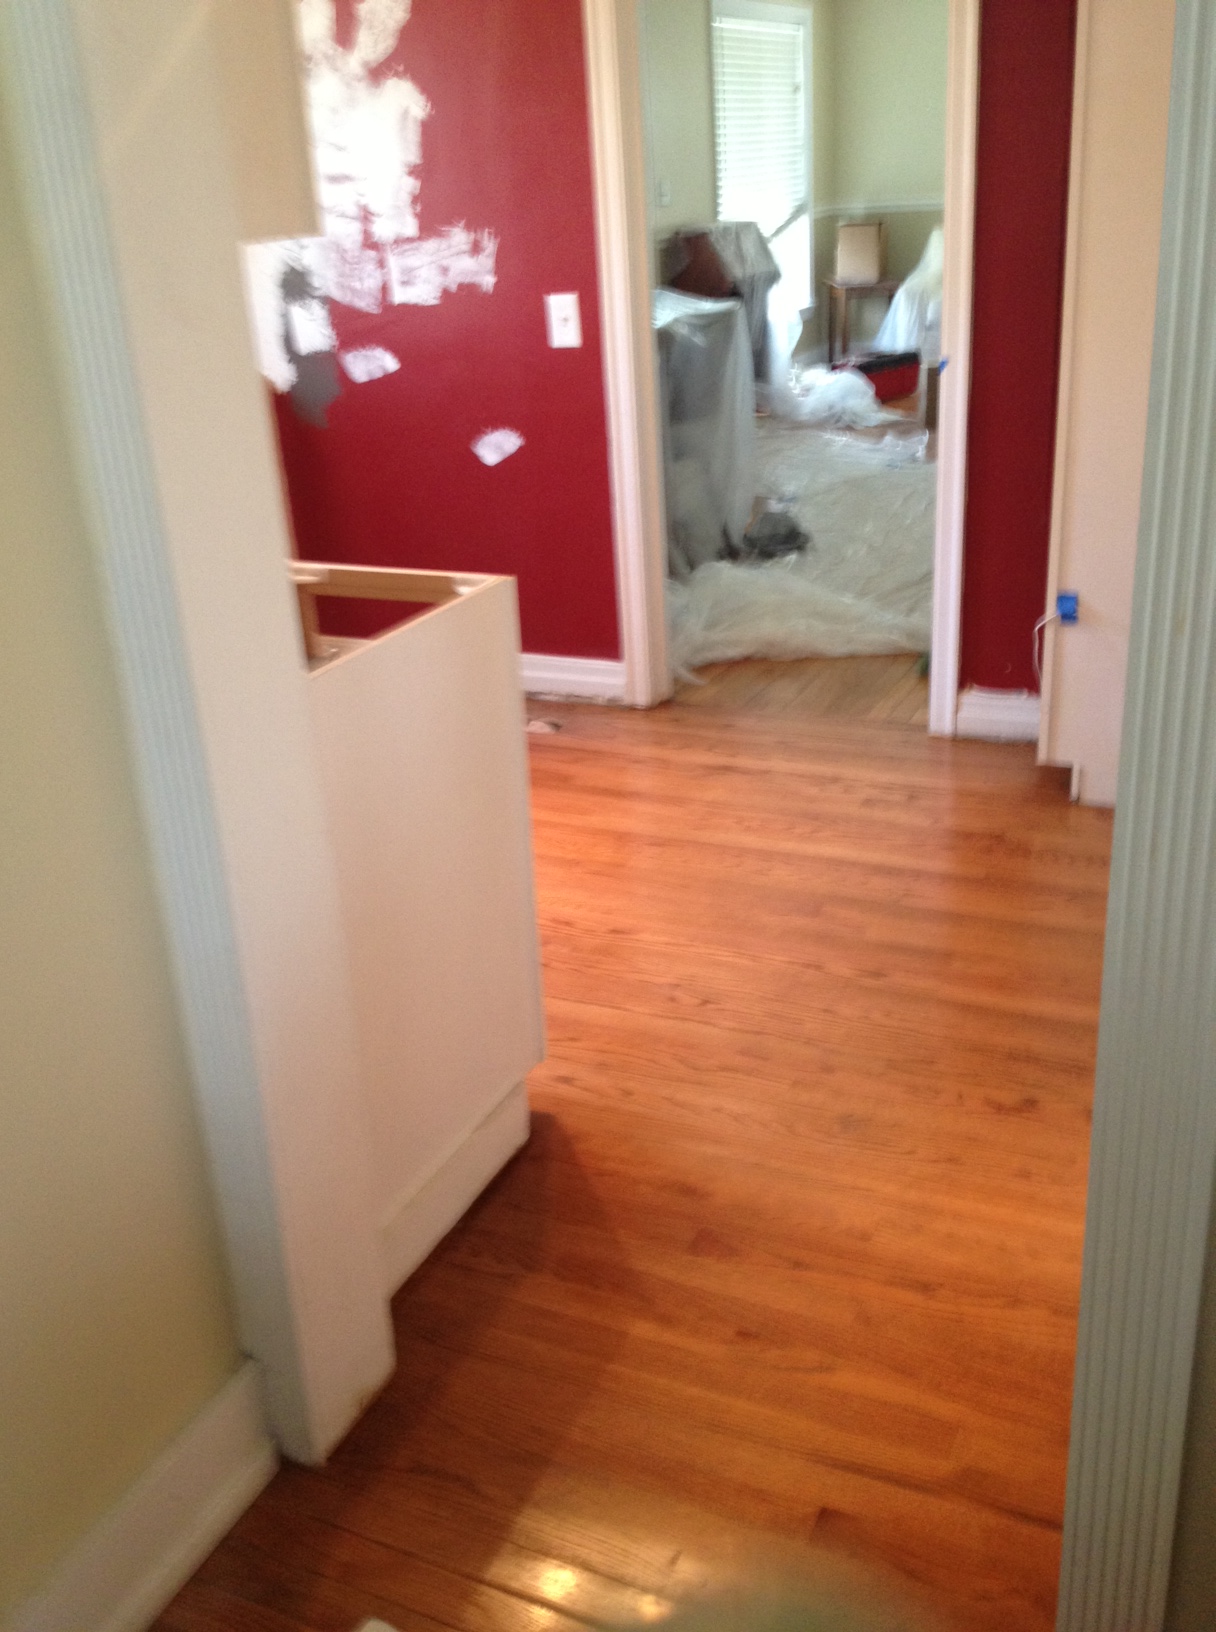
This is the only picture I could find of the floor "before." Apparently I hated taking pictures of it because it's so heinous.
AFTER:
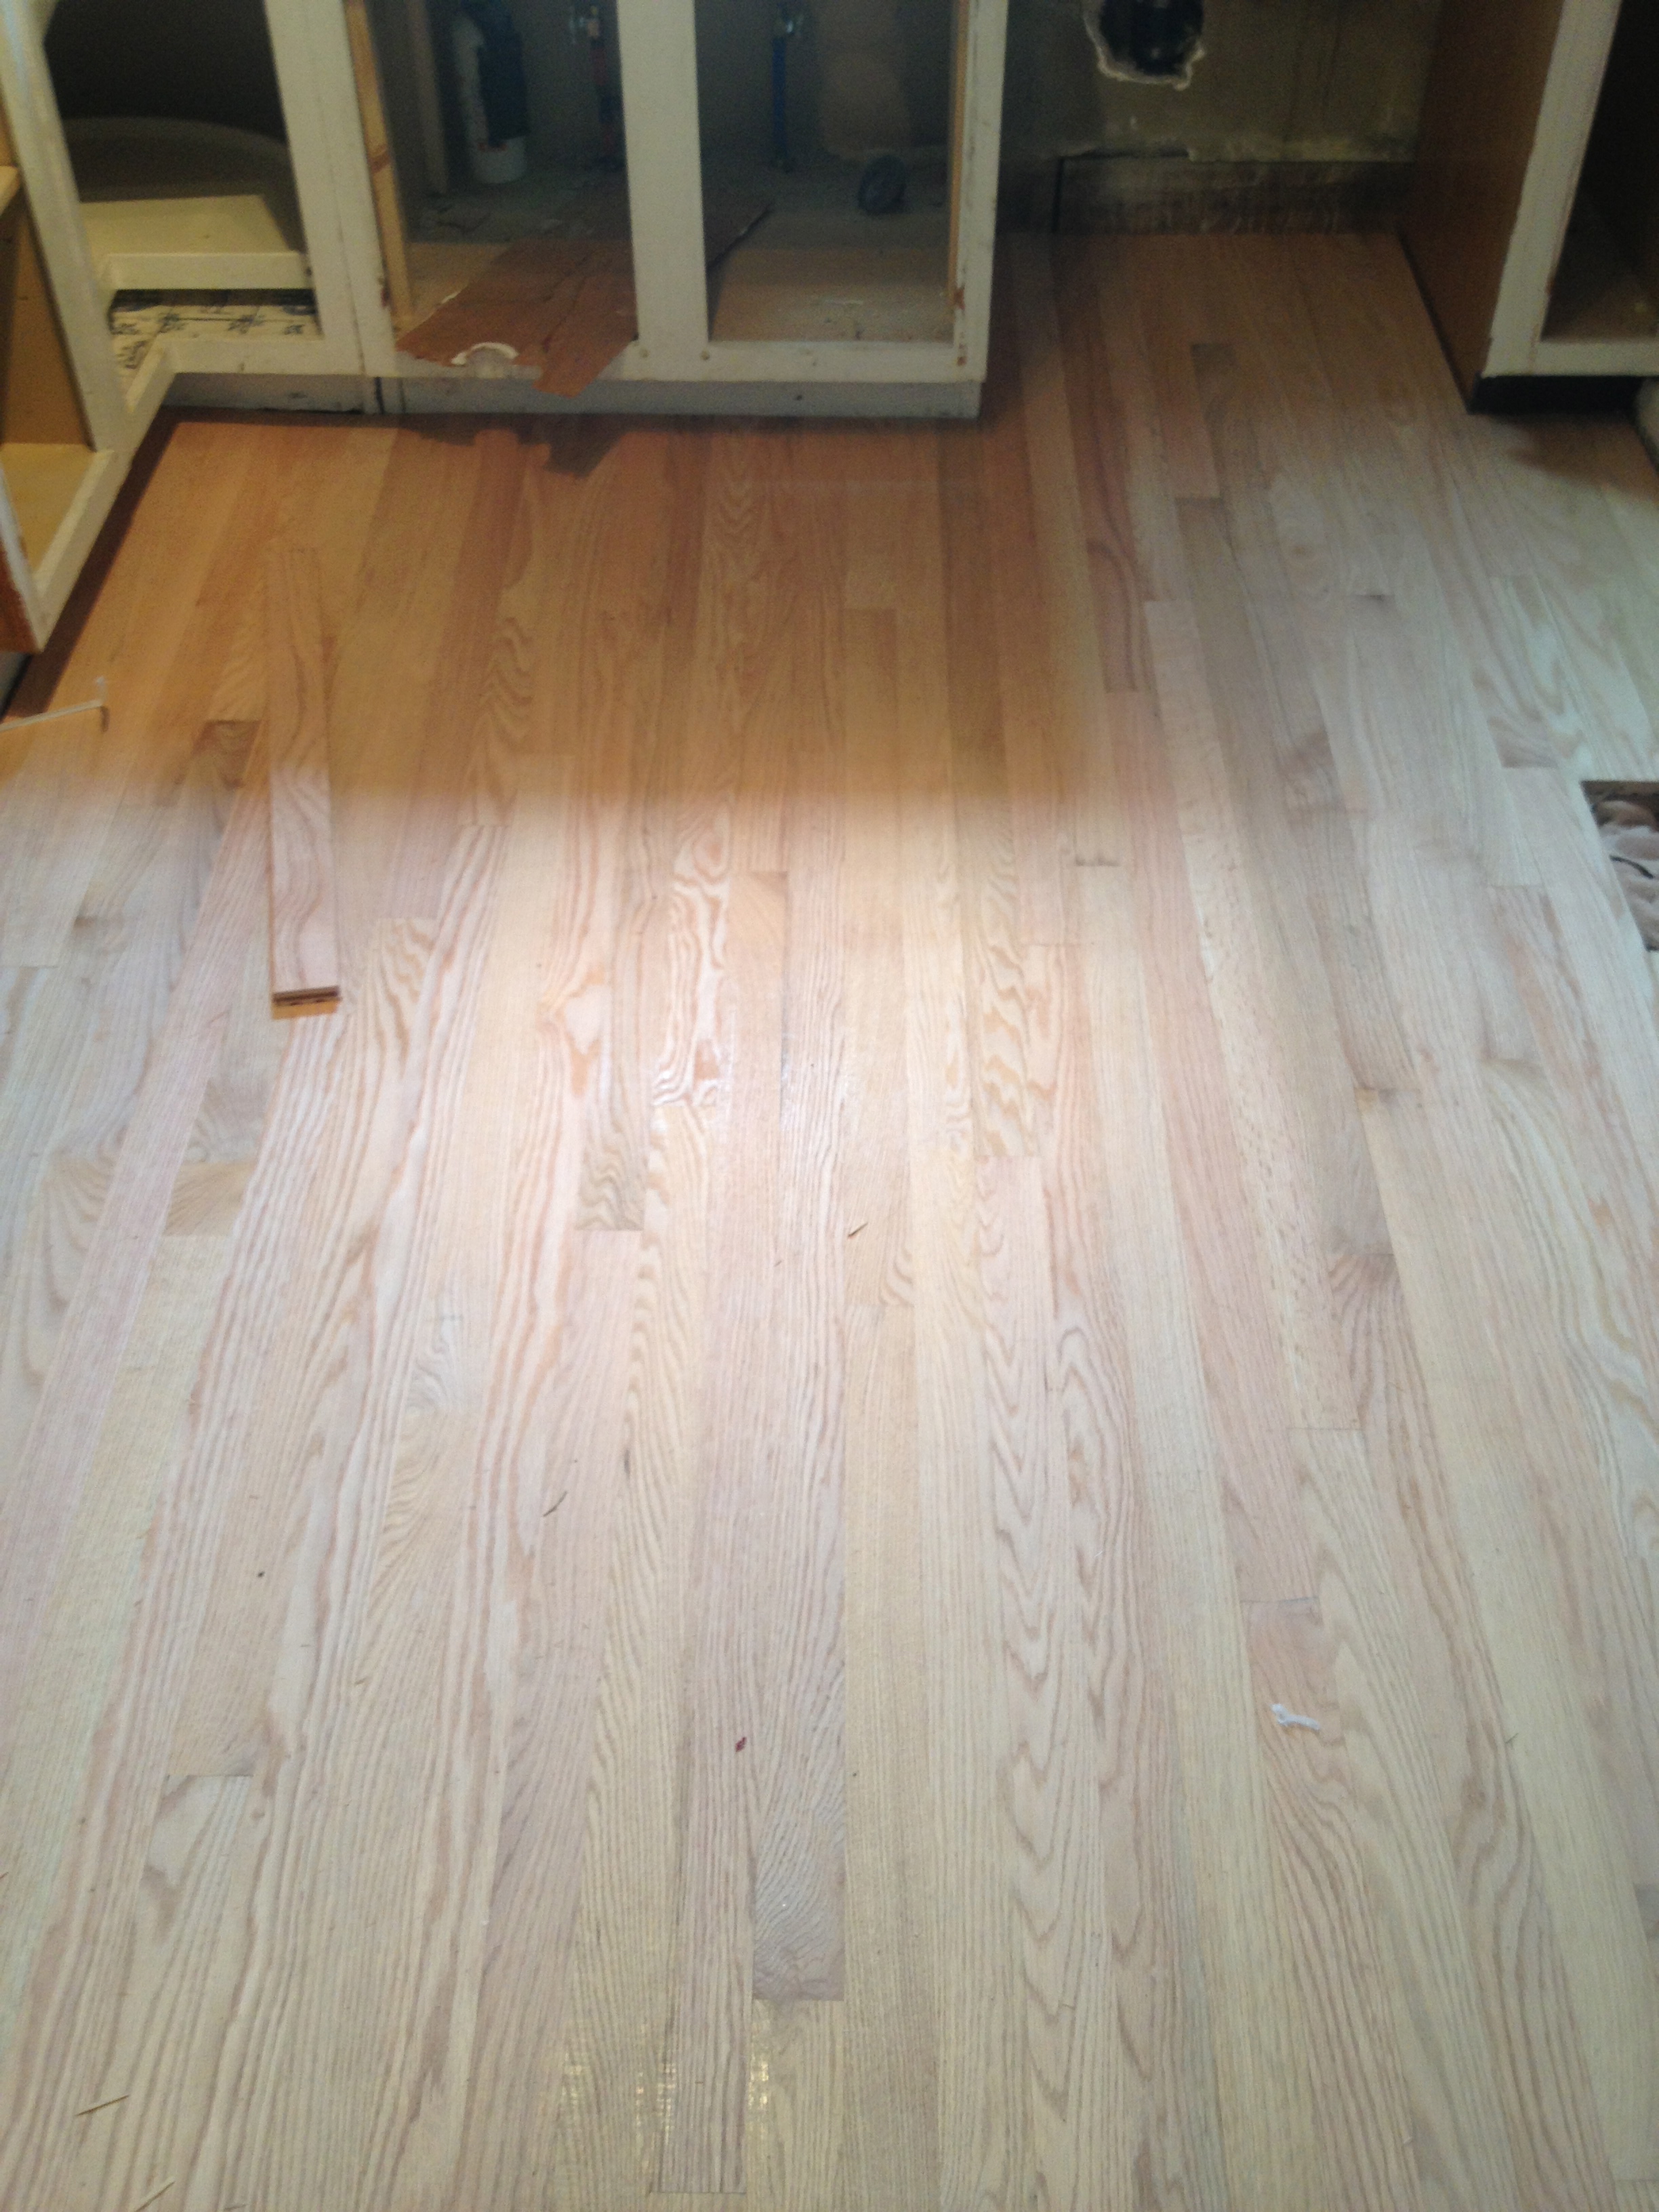
Here's a photo from the den looking into the kitchen. They've already put a stain down, here... but as you can tell the color was really light... and just didn't look right up against the other floors (after all, we are goign to have three different hardwoods going on in our tiny house and we want them to look at least a little bit alike).

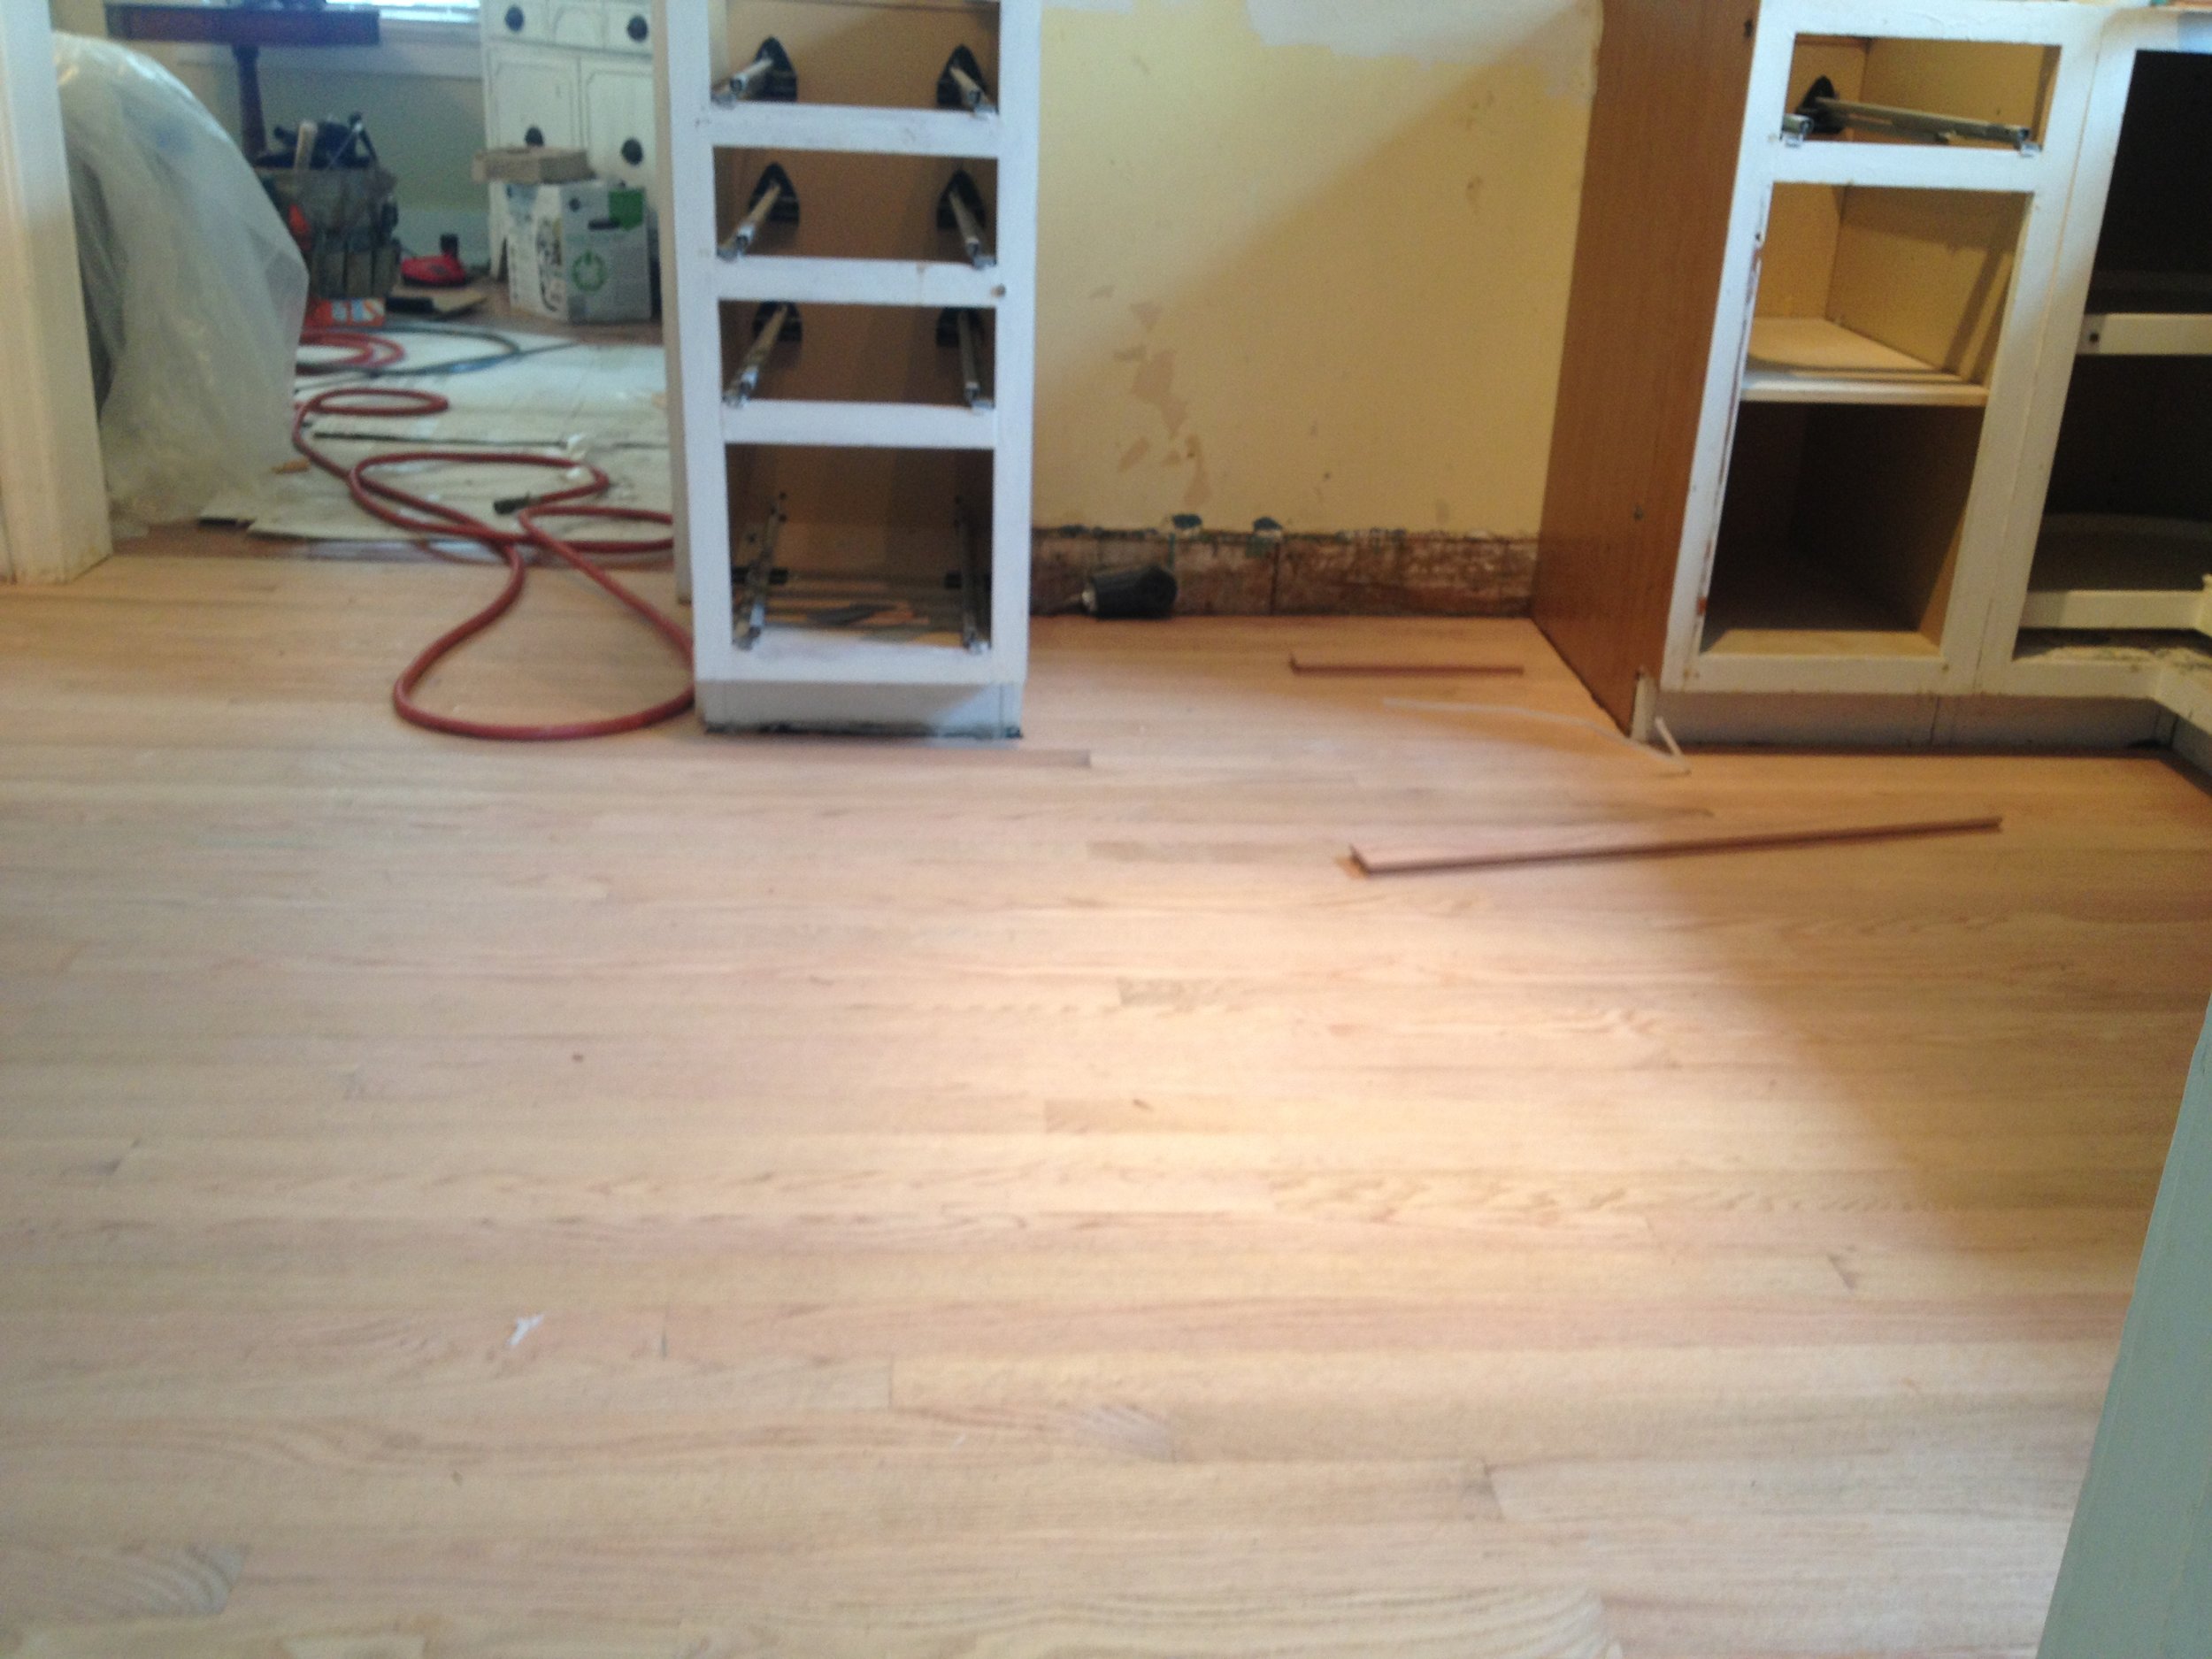
So we asked the nice folks at Verchota Floors if they could try again on the stain... to warm it up a bit. Here's what it looks like now:
Much better, am I right?
We can't wait to show ya'll the rest! It's really coming together nicely. How are things where you are? Bonkers? is spring busy for everyone, or just for people who are remodeling?